Managing Users and Identity Providers
Create and manage user accounts and configure identity providers for authentication in Validio.
The Users settings page in Workspace > Users lets you create and manage user accounts and configure identity providers for authentication in Validio. For an overview of how users, teams, namespaces, and roles work together, see About Validio RBAC.
Workspace > Users and Identity Providers
On this page:
- Manage Users — Create user accounts, assign login types and global roles, and update or delete users.
- Manage Identity Providers — Configure Local or SAML 2.0 identity providers, set up SCIM synchronization, and update or delete providers.
Manage Users
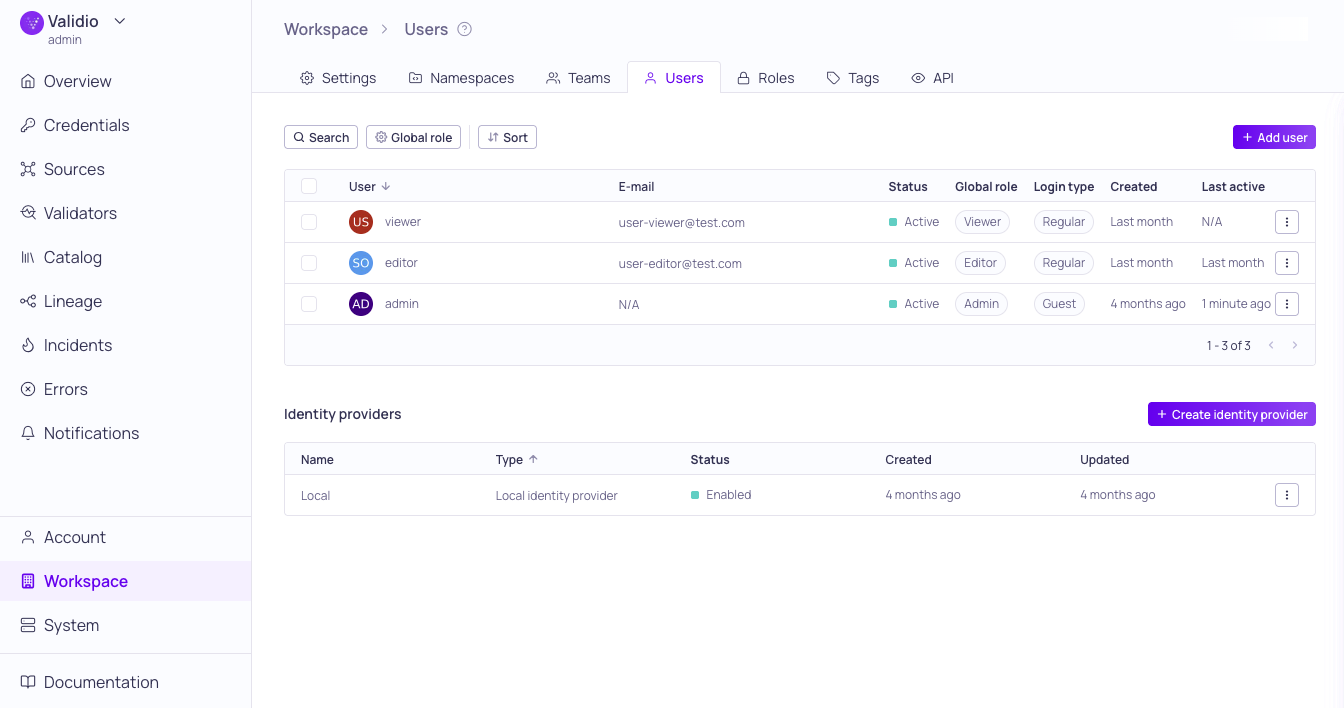
The Users section lists users created in your Validio system. For each user, it displays information on access privileges, status, associated identities, and creation date. You can also see more configuration information for individual users by clicking on a User to open the information sidebar.
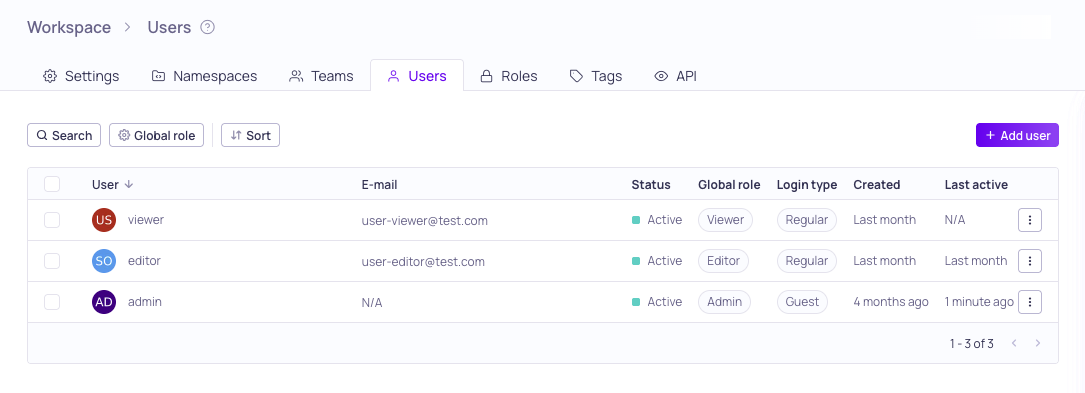
Workspace > Users
Login Types
Login types provide users the following capabilities:
| Role | Viewing capabilities | Modifying capabilities |
|---|---|---|
| Guest | All | None |
| Regular | Based on assigned Role | Based on assigned Role |
Users can log in as Guest using their username and password, even if the Local identity provider is disabled. The Guest login type can be used to provide access to external support users who are not part of your SSO provider.
Global Roles
A user's global role provides the following viewing and modifying capabilities:
| Global Role | Viewing capabilities | Modifying capabilities |
|---|---|---|
| Admin | All | All |
| Editor | All | Catalog assets, Saved searches, Lineage, Tags |
| Viewer | All | None |
| Custom | User-defined | User-defined |
The users capabilities can be overridden by Team and Namespace assignments. For more information, see Managing Roles.
You can also set a default user role to automatically assign to all new users added to your workspace. For more information, see Configuring Global Settings.
Search, Filter, and Sort
You can use the following controls to quickly find users in the list:
- Search: Type keywords to match against the user's display name.
- Global role filter: Filter the list by one or more global roles (Admin, Editor, Viewer, or Custom). You can filter for Any of (matches users with any selected role) or None of (excludes users with the selected roles).
- Sort: Select a field name to sort the list in ascending or descending order.
Add a New User
To create a new user,
-
In Workspaces > Users, click + New user.
-
Under Configure details, fill in the configuration parameters:
Field Description Display name User identifier in Validio Full name User's first and last name Email User's email address (validated to ensure it matches the standard format) User status Active, Pending (has not logged in), or Inactive (cannot log in) Login type Guest or Regular. See Login Types Global role Viewer, Editor, Admin, or a Custom role. See Global Roles -
(Optional) Check Create username and password to manually assign credentials.
-
Click Create user.
Update and Delete Users
Click the ⋮ menu and select:
- Update to modify the user details, status, or role.
- Delete to remove the user.
To make bulk updates, you can select more than one user. Bulk actions include
- Update role: Assign a new role to the selected users.
- Remove: Delete the selected users.
Manage Identity Providers
The Identity provider (IdP) section lists all IdPs configured on your Validio system. For each provider it displays status, type, and dates for creation and last updated. You can also see more configuration information for individual IdPs by clicking on a row to open its information sidebar.
Configuring identity provider with SCIM
For provider-specific setup instructions, see SAML SSO.
Add a New Identity Provider
To configure a new identity provider,
-
In Workspaces > Users > Identity Providers, click + New identity provider.
-
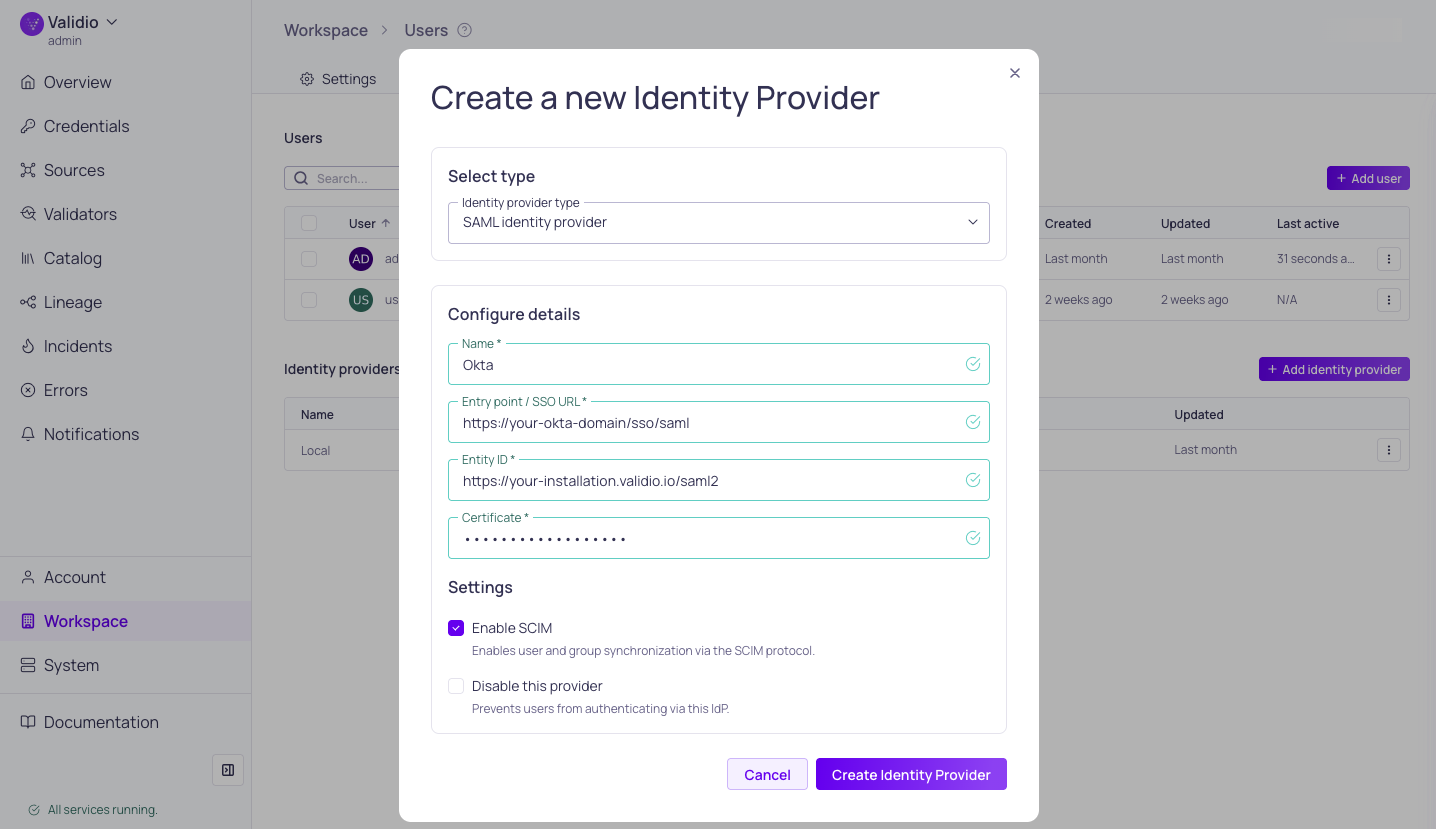
Under Select type, select either Local identity provider or SAML identity provider (SAML 2.0).
-
Under Configure details, fill in the required parameters:
Parameter Description Name Unique display name in Validio Entry point / SSO URL SSO URL or Location URL for the configured identity provider Entity ID The unique identifier for your Validio instance in SAML assertions. Use the format: Application URL/saml2Certificate Identity provider certificate (plain text) -
Under Settings,
-
(Optional) When configuring a SAML identity provider, check Enable SCIM to enable user and group synchronization via the SCIM protocol.
- Copy or save the generated SCIM API Key to configure user provisioning in your identity provider. See SCIM Synchronization.
-
(Optional) Check Disable this provider to prevent users from authenticating with this identity provider. You can enable it later by updating the identity provider.
-
-
Click Create identity provider.
SCIM Synchronization
SCIM, or System for Cross-Domain Identity Management, enables large organizations to automatically provision and de-provision users and groups using external identity providers like Okta or Entra ID, eliminating the need to duplicate work in Validio.
- Syncing Users and Groups: Users and groups assigned in the identity provider are imported into Validio. For example, pushing the "validio admins" group from Okta will create a corresponding team in Validio, and users in that Okta group will be added to the Validio team.
- De-provisioning: When a user is removed from the identity provider (like Okta), they are automatically set to inactive in Validio (not deleted). Inactive users cannot log in.
Validio teams have a global role, allowing for easier management of global permissions for groups synced from the identity provider. See Managing Teams.
Supported SCIM Actions
Validio supports the following types of SCIM provisioning actions configured on the identity provider:
- Push new users: When you create a new user in your identity provider, sends a SCIM request to add the new user to Validio.
- Push profile updates: When you change user attributes in your identity provider, sends a SCIM request to update corresponding users in Validio.
- Push groups: When you assign groups in your identity provider, sends a SCIM request to create Teams with corresponding memberships in Validio.
Configuring SCIM
Prerequisite: Enabling SCIM requires setting the Application URL in your Validio Workspace Settings. The Application URL is the URL to your Validio installation or deployment instance.
In the external identity provider, configure the following:
- SCIM API key: Enabling SCIM in the Validio SAML identity provider configuration generates a unique SCIM API key that you will configure in the external identity provider as the Bearer authentication token.
- Base URL: The SCIM endpoint URL that your identity provider uses to send provisioning requests to Validio. Use the format:
Application URL/scim/v2The name of this setting may be different depending on the identity provider. For example, "SCIM connector base url" in Okta and "Tenant URL" in Entra ID.
- Provisioning Actions: Select the provisioning actions you want to enable for your SCIM configuration.
Enabling SCIM on VPC Environments To enable SCIM provisioning, your identity provider must be able to communicate (and sync users and groups) with your Validio instance. If your instance is hosted on a private network (such as a restricted VPC):
- Endpoint Accessibility: Ensure your SCIM endpoint is accessible via a public DNS name.
- Firewall Configuration: Allow inbound HTTPS traffic (Port 443) from the relevant IP ranges (for example, Microsoft Entra ID IP Ranges).
- SSL Requirements: Your endpoint must use a publicly trusted SSL certificate.
Update and Delete Identity Providers
Click the ⋮ menu and select:
- Update to modify Name, and enable/disable the provider.
- Delete to remove the identity provider. This option is only available when you have more than one IdP configured in your workspace.
Updated 20 days ago