Jira
Create Jira issues from Validio incidents using a Jira integration and channel.
The Jira integration lets Validio create Jira issues for data quality incidents, source errors, and other events, so your team can triage data problems in the same tracker you already use.
Validio supports Jira Cloud and Jira Data Center. You configure the connection once as an integration and then create one or more notification channels that route alerts to specific projects and issue types.
Prerequisites for Adding a Jira Integration
Before creating the integration in Validio, you will need the following in Jira:
- A Jira account with permission to create issues in the target project and to browse projects and issue types (the channel form discovers available projects and issue types from your Jira instance).
- The Base URL of your Jira instance, for example
https://your-account.atlassian.netfor Jira Cloud. - Authentication credentials. The supported types depend on your platform. Generate the credential for the authentication type you plan to use:
- Jira Cloud – Basic Auth: the account's email address and an API token created from your Atlassian account settings.
- Jira Cloud – Service Account: a scoped API token generated for a service account in the Atlassian admin console.
- Jira Data Center – Personal Access Token: a PAT created from your Jira profile.
- Jira Data Center – OAuth 2.0: a client ID and client secret from an OAuth 2.0 incoming link configured in Jira.
- A Webhook secret — a strong secret value that you choose. You use the same value in two places: on the Validio integration and on a webhook in Jira, so Jira can send issue updates back to Validio. See Configure Jira to Send Updates to Validio.
- A Project key and Issue type (for example,
DATAandBug) for each channel you plan to create.
Create a Jira Integration
To add a new Jira integration in Validio:
- Navigate to Workspace > Integrations and click + New integration.
- From the Integration type list, select Jira.
- Enter a Name that describes the integration, for example "Atlassian Cloud".
- Under Configuration, enter the Base URL and select the Platform (Cloud or Data Center).
- Enter a Webhook secret. Choose any strong secret value — you set this same value on a webhook in Jira so that Jira can authenticate the issue updates it sends back to Validio. See Configure Jira to Send Updates to Validio.
- Under Authentication, select the Authentication type and complete the matching fields. The dropdown only shows the auth types valid for the selected platform: Basic Auth and Service Account for Cloud, Personal Access Token and OAuth 2.0 for Data Center. Switching the Platform after selecting an auth type resets the auth type to a valid option for the new platform. Refer to Jira Configuration Parameters.
- (Optional) Click Test integration to verify the connection to Jira.
- Click Create integration.
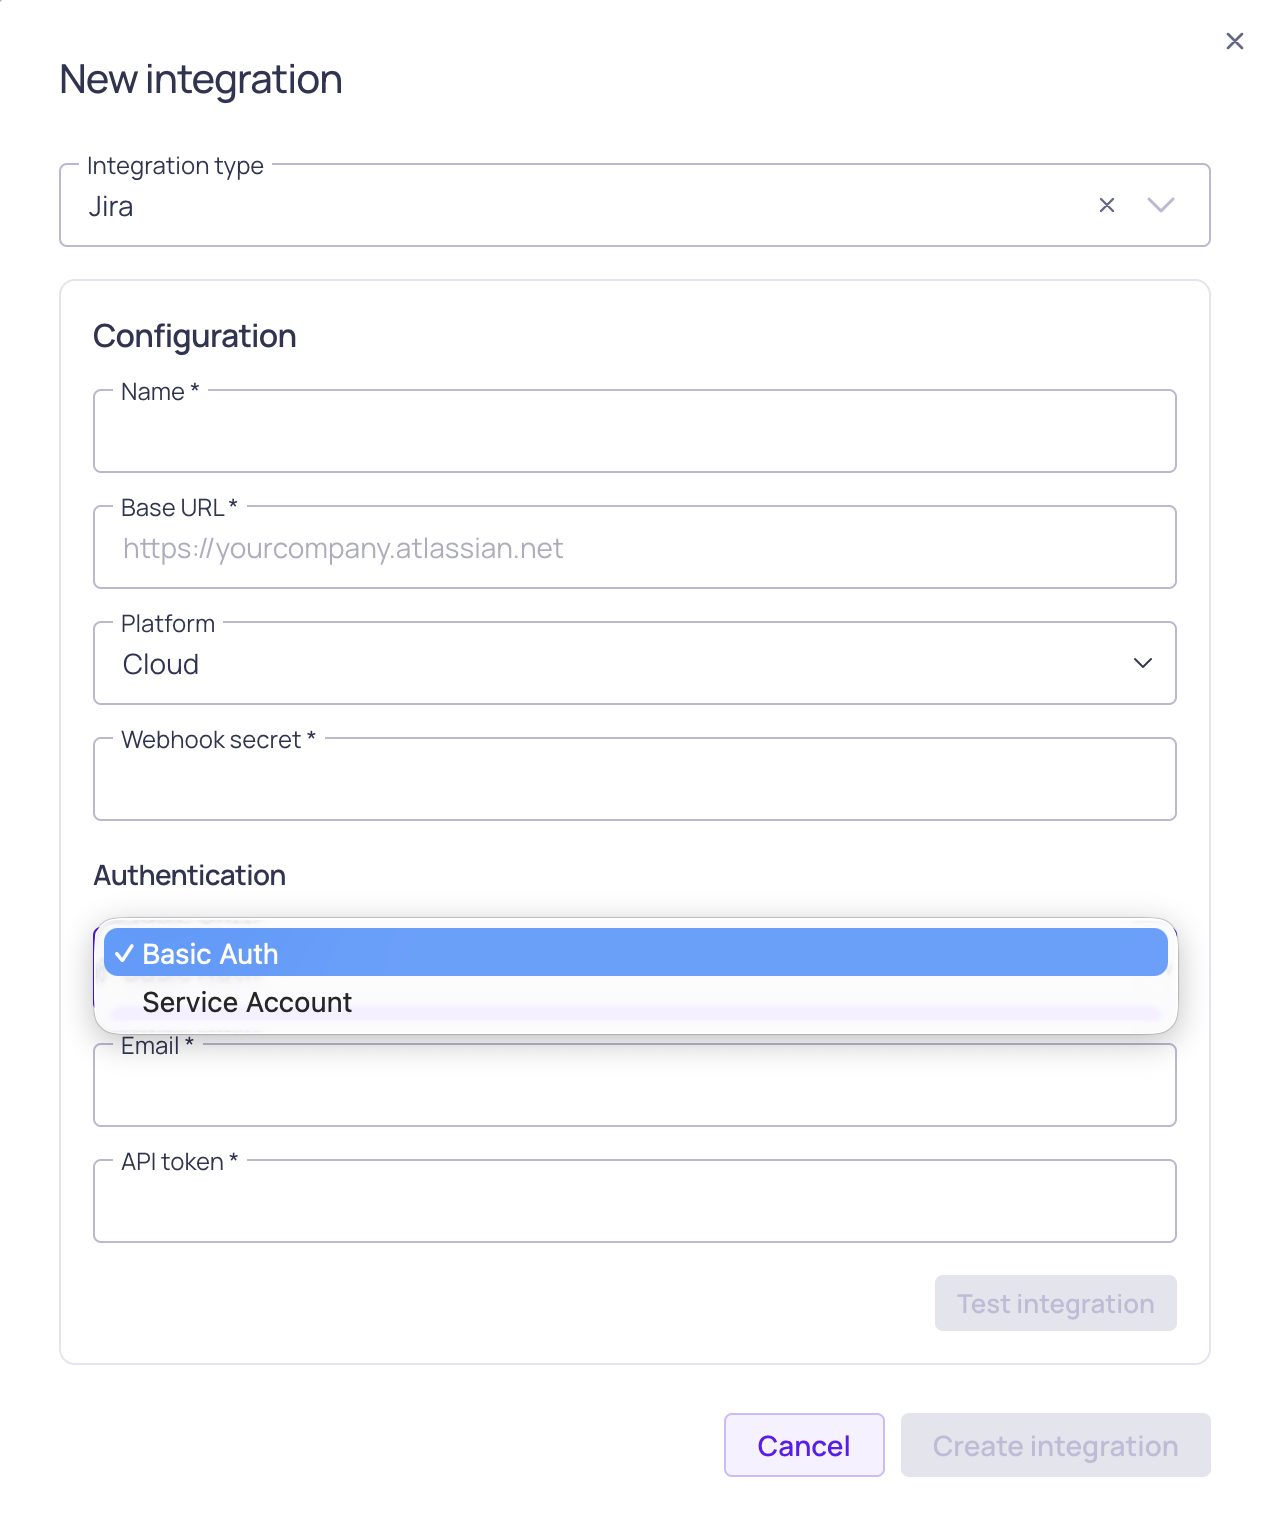
Jira integration configuration with authentication options
Jira Configuration Parameters
| Field | Description |
|---|---|
| Base URL | URL of your Jira instance. For Jira Cloud, this typically ends in .atlassian.net. |
| Platform | Choose Cloud or Data Center based on your Jira deployment. The selected platform filters which authentication types are available. |
| Webhook secret | A secret value you choose. Validio uses it to verify the signature on issue updates that Jira sends back. Set the same value on the Jira webhook — see Configure Jira to Send Updates to Validio. |
| Authentication type | The available options depend on the selected platform. Cloud: Basic Auth or Service Account. Data Center: Personal Access Token or OAuth 2.0. |
| (Basic Auth) The email address of the Jira account Validio will authenticate as. | |
| API token | (Basic Auth or Service Account) The API token generated in Jira for the account. |
| Personal access token | (Personal Access Token) The PAT string generated in Jira. |
| Client ID | (OAuth 2.0) The client ID of the Jira OAuth 2.0 client credentials. |
| Client secret | (OAuth 2.0) The client secret of the Jira OAuth 2.0 client credentials. |
Create a Validio Channel for Jira
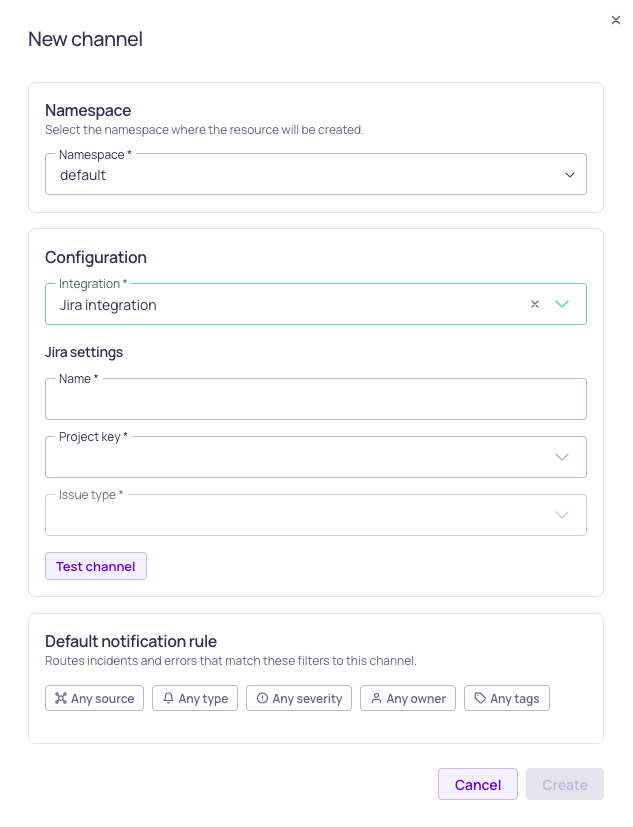
Jira channel and default rule configuration
After the integration is created, create a channel that routes notifications to a specific Jira project and issue type.
- In Validio, navigate to Notifications > Channels and click + New channel.
- Select the Namespace where the channel will live. Only users with access to this namespace can see or use the channel.
- Under Integration, select the Jira integration you just created.
- Enter a Name for the channel that describes its purpose, for example "Data Quality Bugs".
- Under the Jira-specific settings, choose the Project and Issue type. Both fields are dropdowns that load options directly from your Jira instance. If discovery fails (for example, due to invalid integration credentials), the form shows a banner explaining the failure and falls back to plain text inputs so you can still enter the values manually, for example
DATAandBug. If you see the failure banner, verify the integration's credentials on Workspace > Integrations and reopen the channel dialog. - (Optional) Add a Default notification rule. You can add more rules and conditions later.
- Click Create.
After the channel is created, add notification rules from the channel's details page to control which incidents create Jira issues.
Configure Jira to Send Updates to Validio
Validio syncs changes bidirectionally: after you configure a webhook in Jira, updates to a Jira issue flow back to the matching Validio incident. Validio updates the incident when the issue's status changes, reassigns the incident owner when the issue's assignee changes, and adds the issue's comments to the incident.
This works the same way for Jira Cloud and Jira Data Center, using Jira's built-in webhooks.
- In Jira, go to Settings (⚙) > System and, under Advanced, select WebHooks.
- Click Create a WebHook and enter a Name, for example "Validio incident sync".
- In URL, enter your Validio application URL with
/jira-webhookappended, for examplehttps://<your-validio-app-url>/jira-webhook. Use the same host you sign in to Validio with. - In Secret, paste the same Webhook secret you entered on the Validio integration. Jira uses this secret to sign each request, and Validio verifies the signature before accepting the update.
- Under Events, select Issue: updated and Comment: created.
- (Optional) Add a JQL filter to limit the webhook to specific projects or issues.
- Click Create.
The Secret on the Jira webhook must exactly match the Webhook secret on the Validio integration. If the secret is missing or does not match, Validio rejects the updates and issue changes will not sync to incidents.
Jira Issue Content
When a notification rule on the Jira channel triggers, a Jira issue is created in the configured project and issue type. The ticket description includes the incident priority for triage. The source owner populates the issue's Assignee field.
Next Steps
- Add notification rules on the channel's details page to filter which incidents create Jira issues. See Adding Notification Rules.
- Review existing integrations and channels under Workspace > Integrations and Notifications > Channels.
- If you use Jira Data Center with an on-premises deployment, you can add multiple Jira integrations to route to separate instances.
Updated 12 days ago