Business Glossary
Define and manage business terms to provide consistent data definitions across your organization.
The Validio Business Glossary is a centralized repository for business term definitions that enables a consistent data vocabulary across your organization. You can define terms with descriptions, aliases, domains, and owners, and then assign those terms to catalog assets and schema fields to provide business context for your data.
Glossary terms with a domain assigned also power the Domain Lineage graph, which visualizes how data flows between business domains.
The Business Glossary is located under the Catalog > Glossary tab.
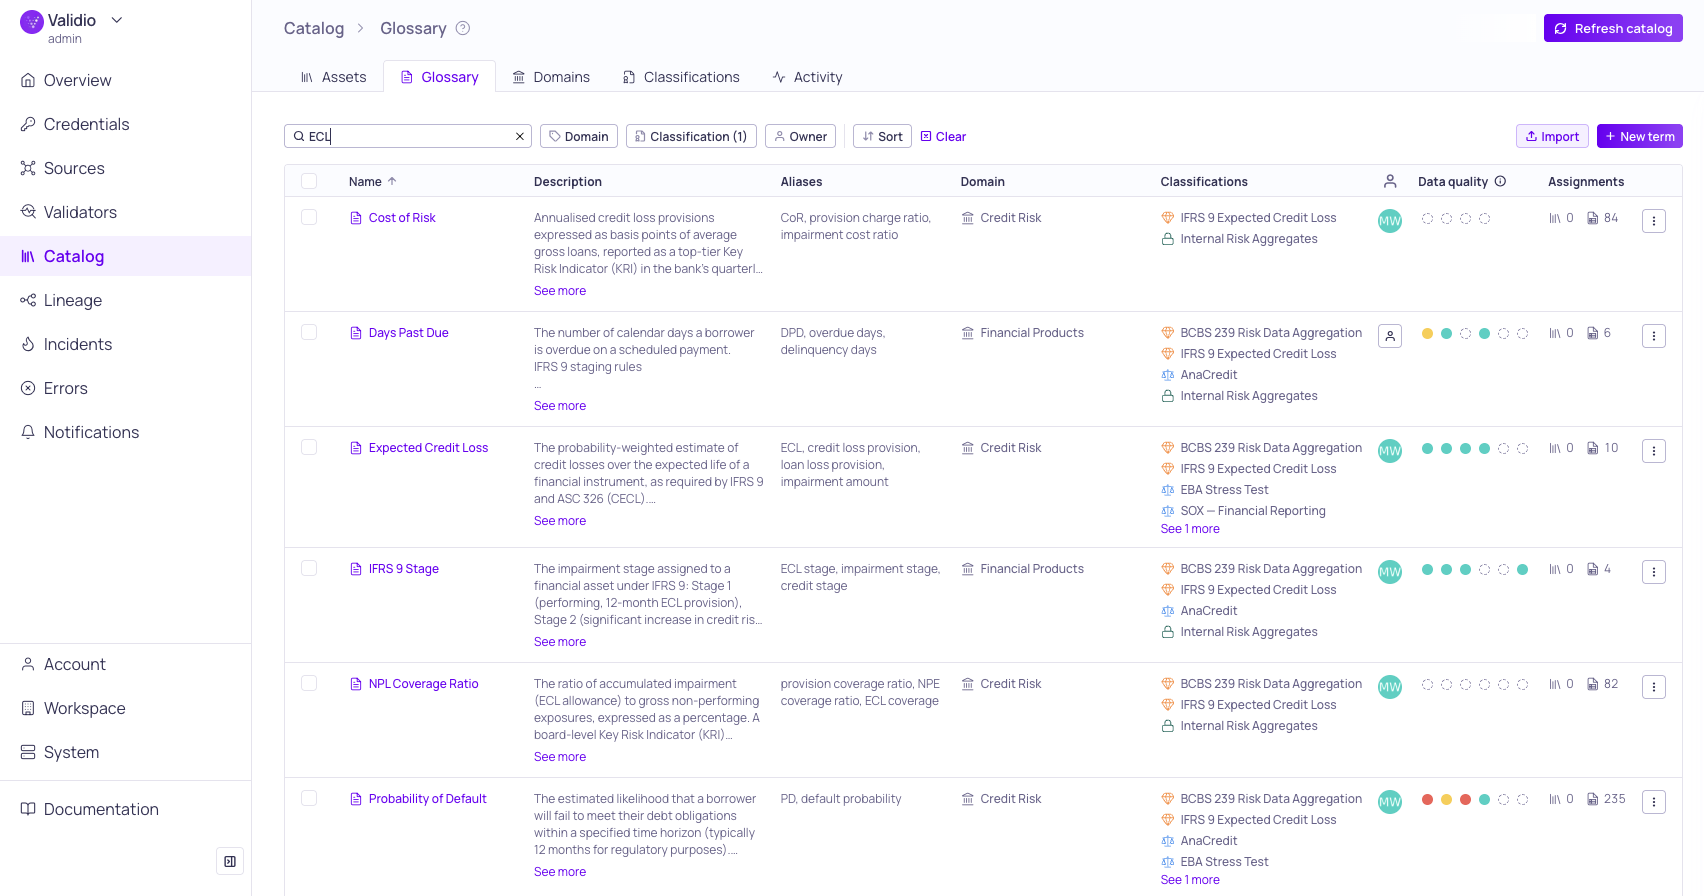
Glossary term list
Prerequisites
Viewing the glossary requires glossary:READ permission (granted to the Viewer role by default). Creating, editing, deleting, and importing terms requires glossary:WRITE permission (granted to Editor and Admin roles by default). For more information, see About Validio RBAC.
Glossary Term Properties
The glossary list page displays all terms in a table with the following columns:
| Property | Description |
|---|---|
| Name | A unique name for the term. |
| Description | A free-text definition of the term. |
| Aliases | Alternative names or acronyms for the term. |
| Domain | An organizational category for the term, selected from existing Domains. |
| Classifications | Governance tags attached to the glossary term. See Classifications. |
| Data quality | Term-level health using one colored dot per dimension. See Data Quality Dots on the Glossary List. |
| Owner | The person responsible for the term, selected from workspace users. |
| Assignment | Count of linked catalog assets and schema fields |
Each term row has an Actions menu, where you can manage (Update and Delete) individual terms. See Managing Glossary Terms.
Browse and Search Glossary Terms
You can search, filter, and sort to find relevant terms:
- Search -- Type keywords into the search bar to filter by term name, description, and aliases. Alias matching helps avoid duplicate terms — for example, searching "ECL" matches the term "Expected Credit Loss".
- Filter -- Use the filter toolbar to narrow results by Domain or Owner.
- Sort -- Use the sort menu to change the sort field and the ordering of terms.
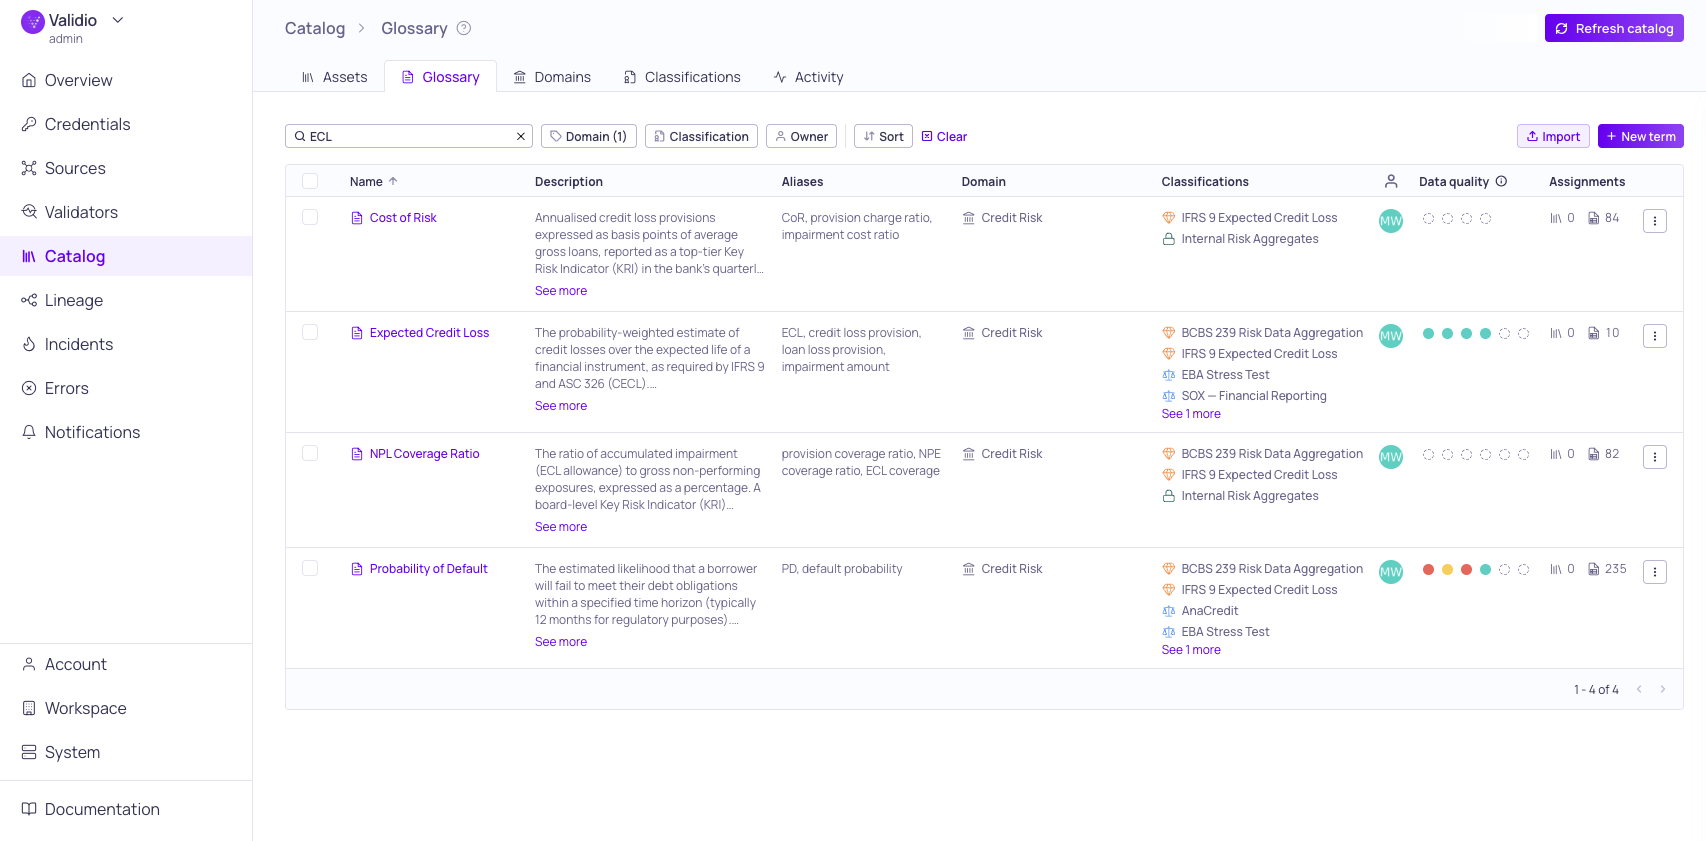
Results for search "ECL" and "Credit Risk" domain filter
To view more information about a term, click the term row to open its details sidebar, or click the term name to navigate to the term details page.
View Glossary Term Details
Click a glossary term row to open the information sidebar, or click the term name in the list to navigate to a term details page.
Glossary Term Sidebar
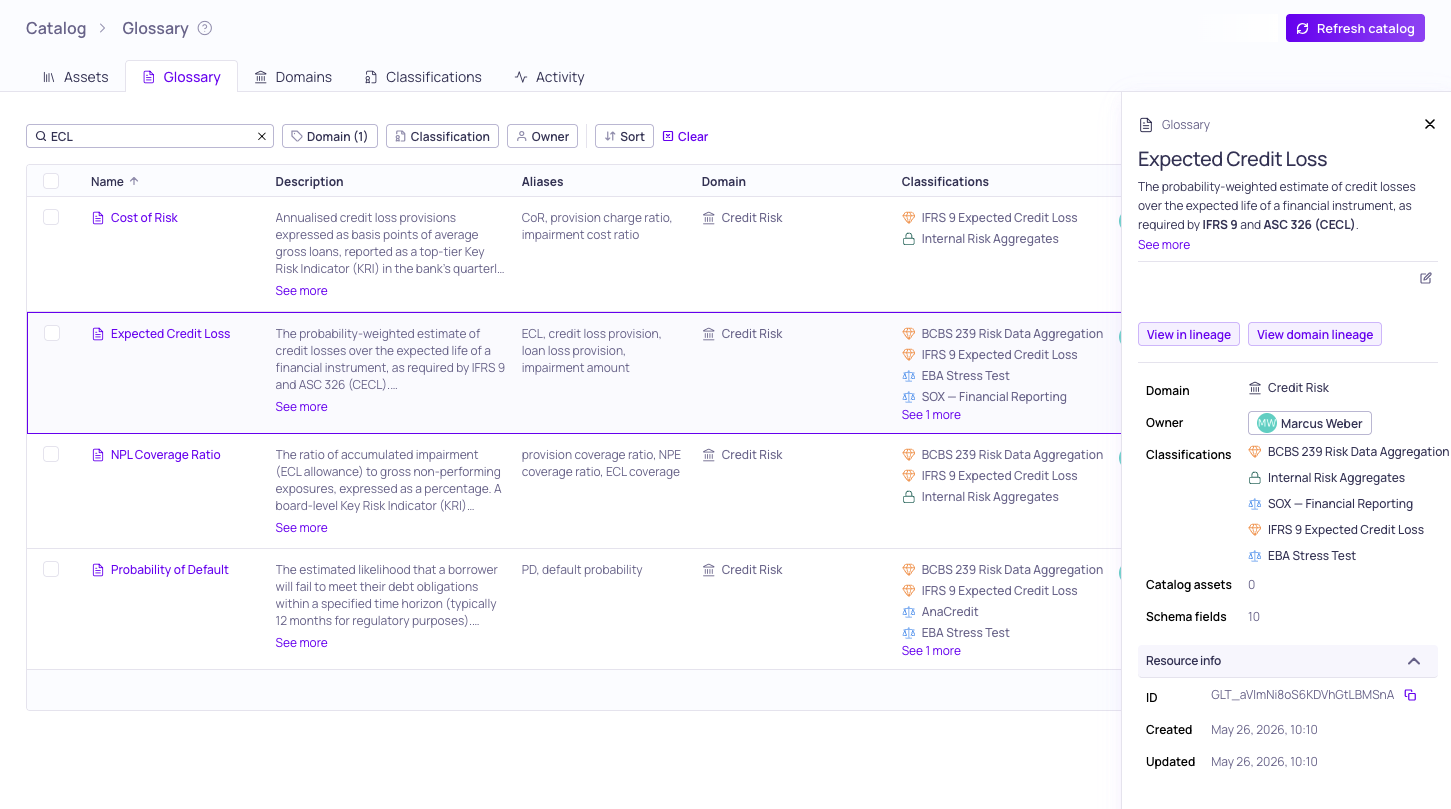
Sidebar for "Expected Credit Loss" term
Opening the sidebar from the glossary list shows a quick view of the term:
- Header section -- Term name, description, aliases, domain, and owner, with inline editing. The description supports markdown formatting and AI description generation.
- Usage statistics -- Count of catalog assets and schema fields assigned this glossary term.
- Linked resources -- Links to view the catalog assets and schema fields assigned this glossary term in the assets list or lineage.
- Resource info -- The glossary term ID and timestamps for creation and last update.
Glossary Term Details Page
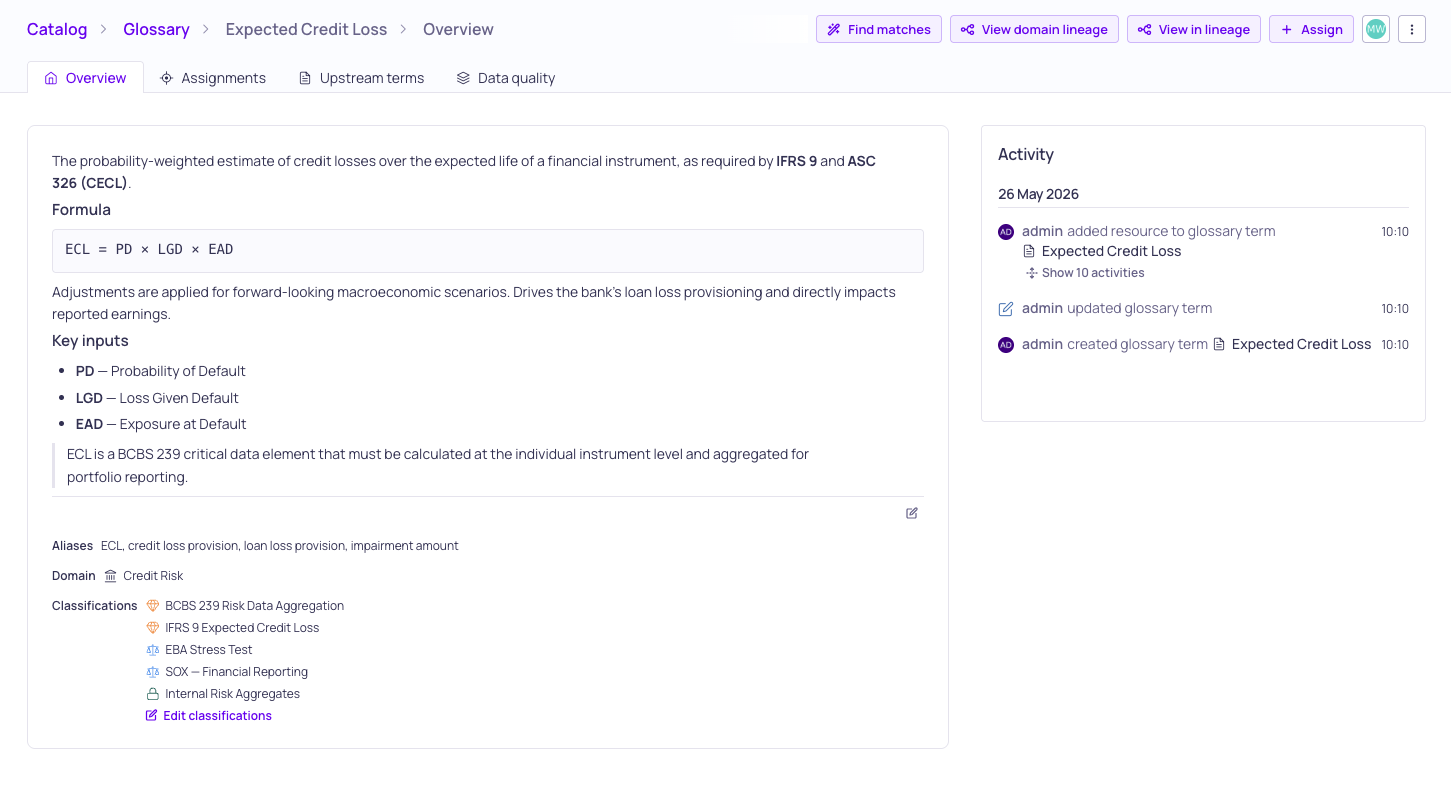
Details overview page for "Expected Credit Loss"
Click the term name in the list to navigate to the term details page. The page is organized into four tabs:
- Overview -- Header section, usage statistics, linked resources, and an activity log of changes (creation, updates, assignments, and removals).
- Data quality -- Per-dimension data quality cards aggregated across every schema field assigned to the term. Each card summarizes how the assigned fields are performing on a single data quality dimension over the selected time range. Use the time range filter at the top of the tab to scope the rollup.
- Assignments -- The list of catalog assets and schema fields assigned to the term, including those propagated via lineage. Use bulk selection to view assignments in lineage or remove them.
- Upstream terms -- Other glossary terms that reach this term via field-level lineage. This view helps you see which business concepts feed into a composite or derived term.
Data Quality Dots on the Glossary List
The glossary list includes a Data Quality column that summarizes term-level health using one colored dot per dimension. Each dot communicates one of three states for that dimension:
| State | Meaning |
|---|---|
| Tracked | The term has at least one assigned field with a validator declaring this dimension. The dot color reflects the dimension's passing/warning/failing band. |
| Missing | The term has assigned fields but no validator on those fields declares this dimension. |
| Not applicable | No assigned fields, or the dimension is not relevant for this term. |
Hover on a dot to see the dimension name and current state. For more on dimensions, see Data Quality Dimensions.
Data Quality Tab
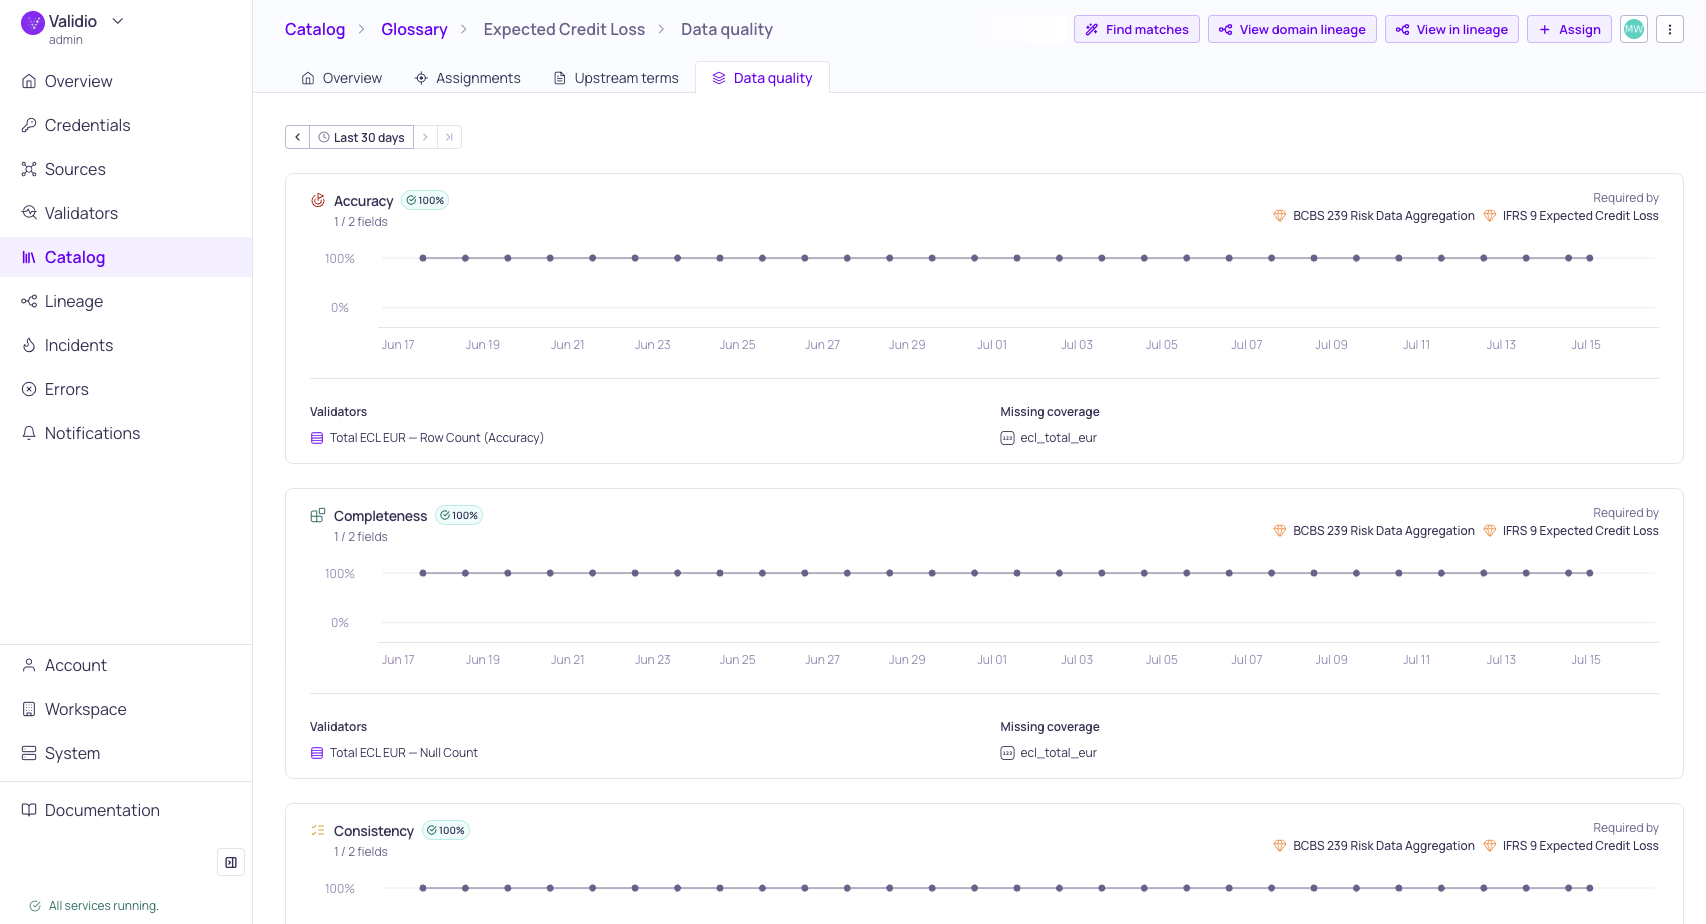
Data quality per dimension for "Expected Credit Loss"
The Data quality tab on a term details page expands the dot view into a per-dimension card grid. Each card shows:
- The dimension name and the passing percentage of validators declaring that dimension on assigned fields.
- A trend over the selected time range.
- Drill-down to the validators contributing to that card.
Use the time range filter at the top of the tab to scope the rollup (e.g., last 7 days, last 30 days). Cards reflect the workspace data quality thresholds for passing, warning, and failing.
Managing Glossary Terms
You can create, edit, and delete glossary terms from the Glossary tab. You can also import and export terms in bulk using CSV files. Editing and deleting can be done from the sidebar, the term details page, or the actions menu on each term row. To automate assigning terms to assets, see Glossary Term Suggestions.
Create a Glossary Term
- Navigate to Catalog > Glossary.
- Click + New term.
- (Required) Enter the term Name.
- (Optional) Add a Description, Aliases, Domain, and Owner.
- Click Create to save the term.
Edit a Glossary Term
- Click a term row to open the sidebar, or navigate to the term details page.
- Click Update to open the update dialog.
- Modify the term properties as needed.
- Click Save to apply changes.
Delete a Glossary Term
- Click the actions menu on a term row, or use the actions on the term details page.
- Select Delete.
- Confirm the deletion in the dialog.
Deleting a term removes all of its assignments to catalog assets and schema fields.
Import Glossary Terms from CSV
You can bulk-create or update glossary terms by importing a CSV file.
- Navigate to Catalog > Glossary.
- Click Import in the toolbar.
- Upload a CSV file with the following headers:
name,description,aliases,domain,owner.- Aliases: Separate multiple aliases with commas within the cell.
- Domain: Matched by name (case-insensitive). The domain must already exist.
- Owner: Matched by email address.
- Click Import to process the file.
The import uses upsert behavior: existing terms (matched by name) are updated, and new terms are created. After import, a summary shows the count of created, updated, and any per-row errors.
Importing terms from CSV creates or updates the term definitions only. To link imported terms to catalog assets and schema fields, you need to assign them separately. See Glossary Term Assignments. You can also use Glossary Term Suggestions to automate term-to-asset matching.
Export Glossary Terms to CSV
You can export your glossary to a CSV file for backup or sharing.
- Navigate to Catalog > Glossary.
- Click Export in the toolbar to download all terms.
To export only specific terms, select them using the checkboxes and click Export selected in the selection toolbar.
The exported file is named glossary-terms-YYYY-MM-DD.csv.
Bulk Actions
Select multiple terms using the checkboxes in the glossary list to access bulk actions:
- Delete selected -- Delete all selected terms (requires
glossary: WRITE). - Export selected -- Export selected terms to CSV (requires
glossary: READ).
Related Resources
- Domains
- Classifications
- Glossary Term Assignments
- Glossary Term Propagation
- Glossary Term Suggestions
- Data Quality Dimensions
- About Domain Lineage
Updated 8 days ago