

Setting up a Microsoft Teams App for Validio
Create a Microsoft Teams app and bot for Validio notifications, and add the app to the Teams channels you want Validio to notify.
This guide discusses the steps to create a Microsoft Teams app and configure it to communicate with your Validio installation. These steps are a prerequisite for setting up a Validio notification channel for Microsoft Teams. For more information, see the Microsoft Teams integration.
You will need to complete the following steps before you can create a notification channel to send messages and alerts from Validio to Microsoft Teams.
- Create a Microsoft Teams app for Validio.
- Create and configure a bot for the app.
- Publish the app to Microsoft Teams.
- Add the app to each Microsoft Teams channel you want Validio to notify.
Steps 1 to 3 are usually done once by a Microsoft Teams administrator or app developer, because they require access to the Microsoft Teams Developer Portal and the Azure portal. Step 4 is done by whoever owns the team or channel that should receive the notifications. If an administrator has already created and published the Validio app for your organization, skip ahead to Add the Validio App to a Microsoft Teams Channel.
Microsoft controls the Microsoft Teams and Azure interfaces, so the screens and labels below can change. If what you see does not match these steps, see Microsoft's documentation on managing apps in the Developer Portal.
Create a Microsoft Teams App for Validio
You need to create a Microsoft Teams app in your Microsoft Developer Portal for Validio. Make sure to give the new app a relevant name, such as validio, to indicate that it will be used to send notifications from Validio.
-
Navigate to your Microsoft Teams App Developer Portal.
-
Click + New app.
-
In the Create a new app dialog, enter a name for the app and click Save.
After saving you're redirected to the Basic Information page for the new app.

Basic information page for a new Microsoft Teams app
-
Fill in the required fields. See the example values in the table.
Field Example Values Short Description Validio notifications Long Description Used for sending notifications from Validio to Microsoft Teams Developer or Company Name Validio Website https://validio.io/Privacy Policy https://validio.io/privacy-policyTerms of Use https://validio.io/terms-of-use -
Click Save.
Create and Configure a Bot for the App
Single-Tenant Bots Only
Microsoft no longer supports multi-tenant bot creation. New bots created in the Microsoft Developer Portal are single-tenant bots. When you configure the Microsoft Teams integration in Validio, you must supply the tenant ID for your single-tenant bot app.
Create a notification bot and configure it with the necessary permission scopes to communicate with your Validio installation.
-
Navigate back to Developer Portal > Apps and select the Validio app you created.
-
Go to Configure > App Features > Bot.
-
Under Identify your bot, click Create a new bot.
-
In the Bot management page,
-
Click + New bot.
-
Enter a name for the bot.
-
Click Save.
After saving, you're redirected to the Configuration page for your bot.
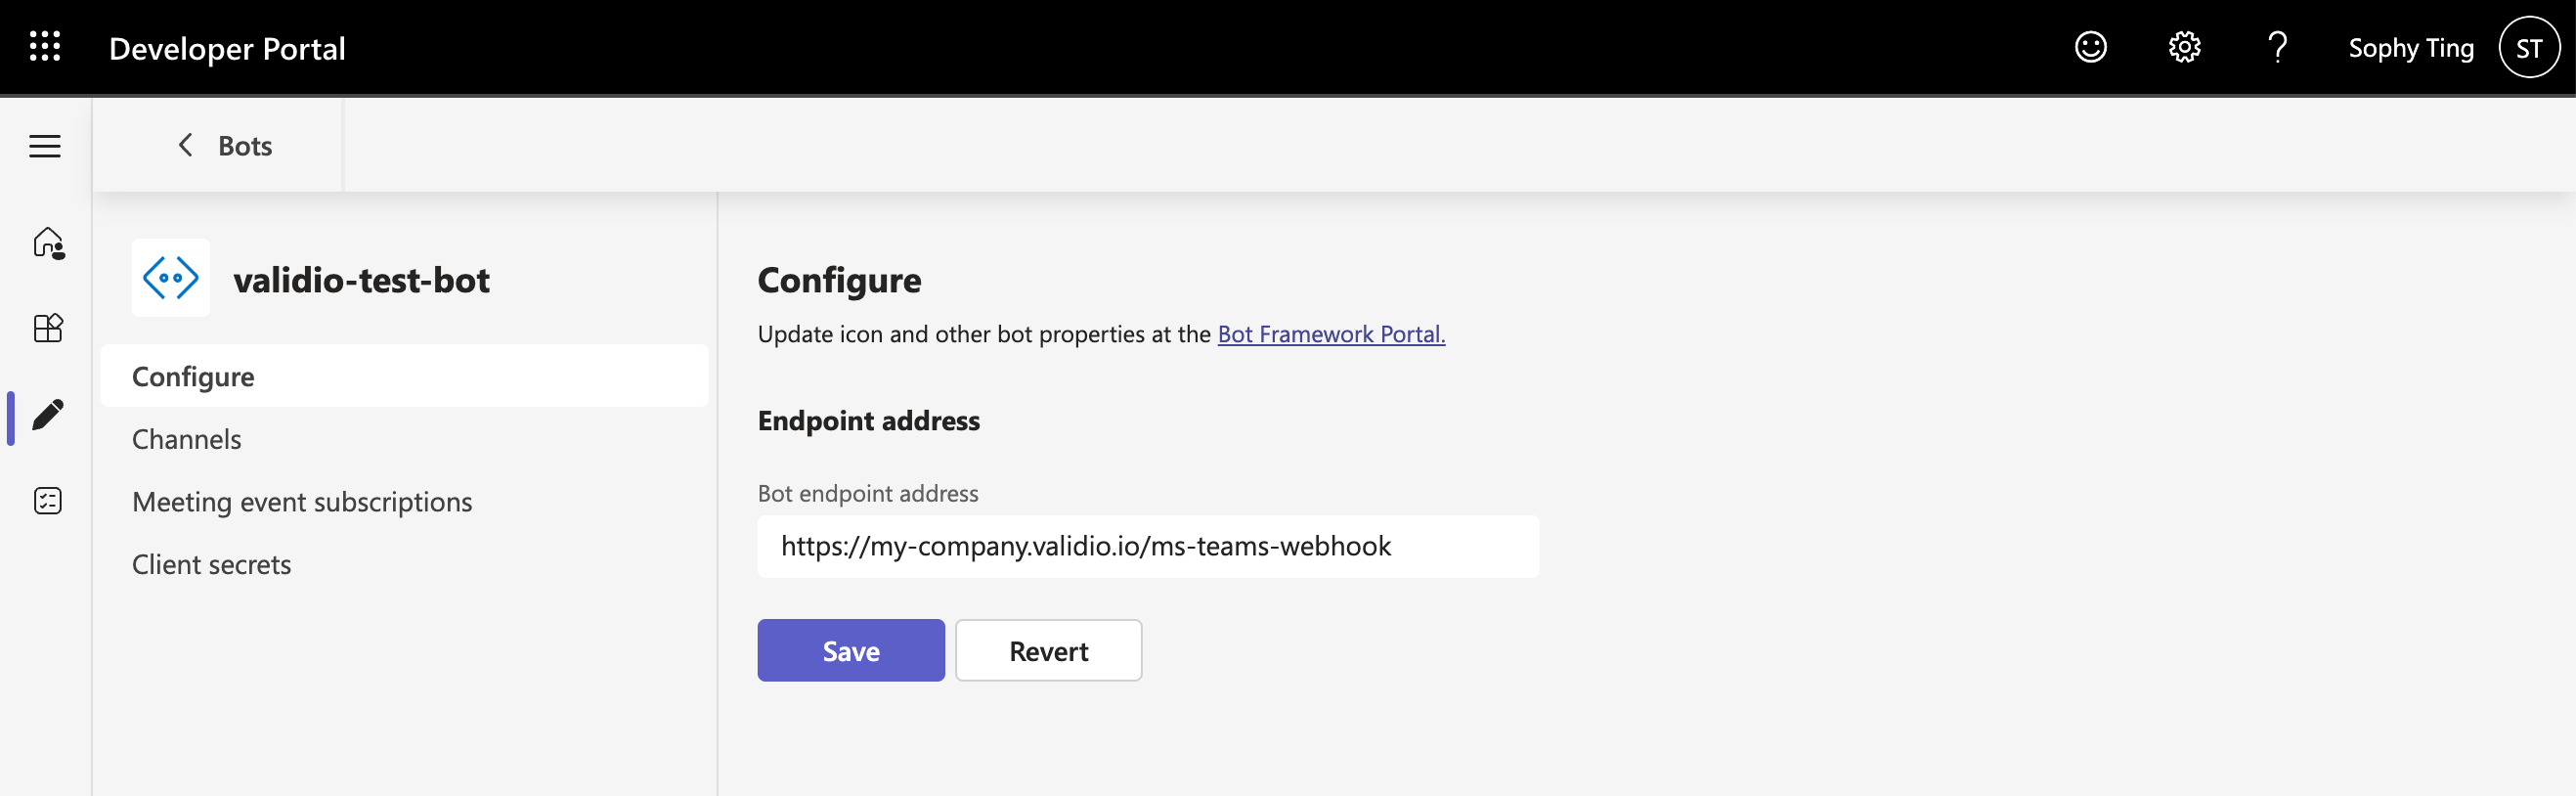
Configuration page for a new bot
-
-
In Configure, set the Bot endpoint address and click Save.
The bot endpoint address is formatted as follows:
<your-Validio-URL>/ms-teams-webhook -
Create the client secret for the bot,
-
Navigate to Azure App registrations.
-
Search for the newly created bot and click on it.
-
On the Overview page, copy and store the Directory (tenant) ID. This is the value to enter for the Tenant ID parameter when you configure the Microsoft Teams integration in Validio.
-
Click Certificates & secrets in the side menu.
-
On the Client secrets tab, click New client secret, enter a description and an expiry period, and click Add.
-
Copy and store the secret Value. This is the value to enter for the Client secret parameter when you configure the Microsoft Teams integration in Validio.
Microsoft shows the secret value only once. If you navigate away before copying it, you must create a new client secret.
-
To connect the bot to the app you created for your Validio notifications,
-
Navigate back to Developer Portal > Apps and select the Validio app you created.
-
Go to Configure > App Features > Bot.
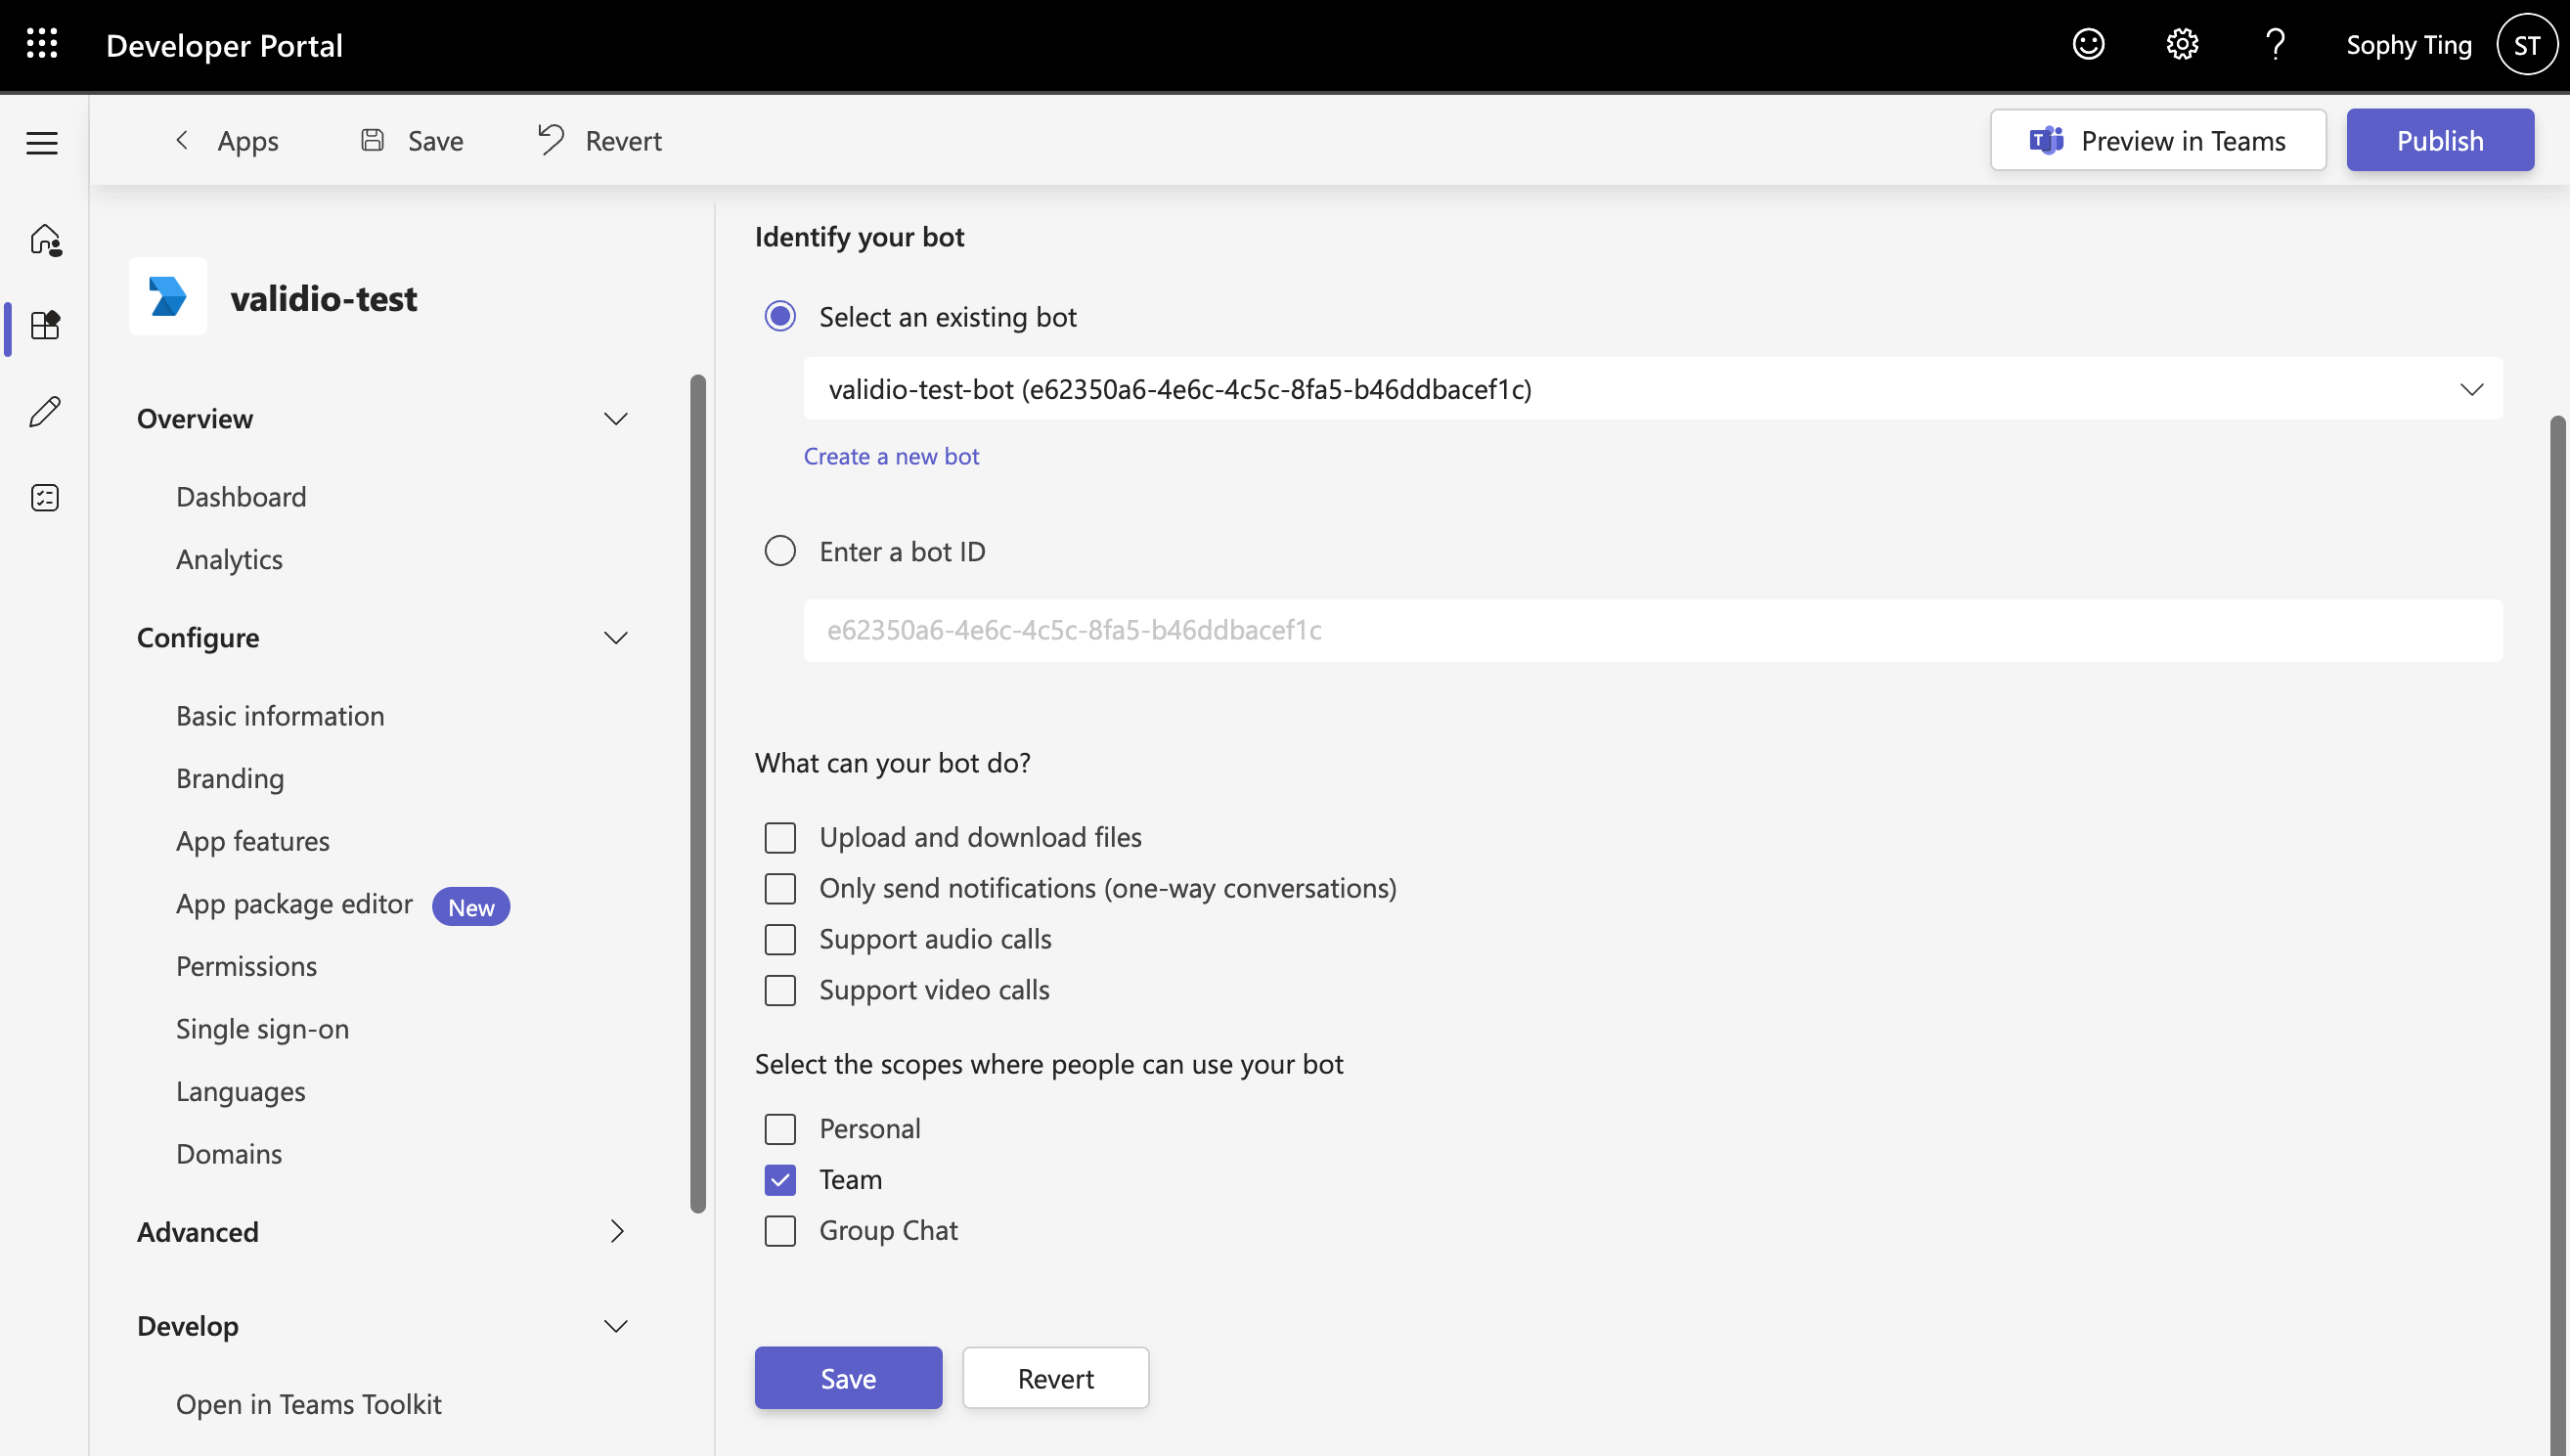
Bot connected to the Validio app
-
Under Identify your bot > Select an existing bot, choose the bot that you created.
-
The bot name includes the bot ID in parentheses and also in the field for "Enter a bot ID". Copy and store the bot ID. This is the value to enter for the Client ID parameter when you configure the Microsoft Teams integration in Validio.
-
Under Select the scopes where people can use your bot, check Team.
-
Click Save.
Publish the App to Microsoft Teams
Publish the app so that people in your organization can add it to their teams and channels. You have two options for publishing the app. Select the one that works for you.
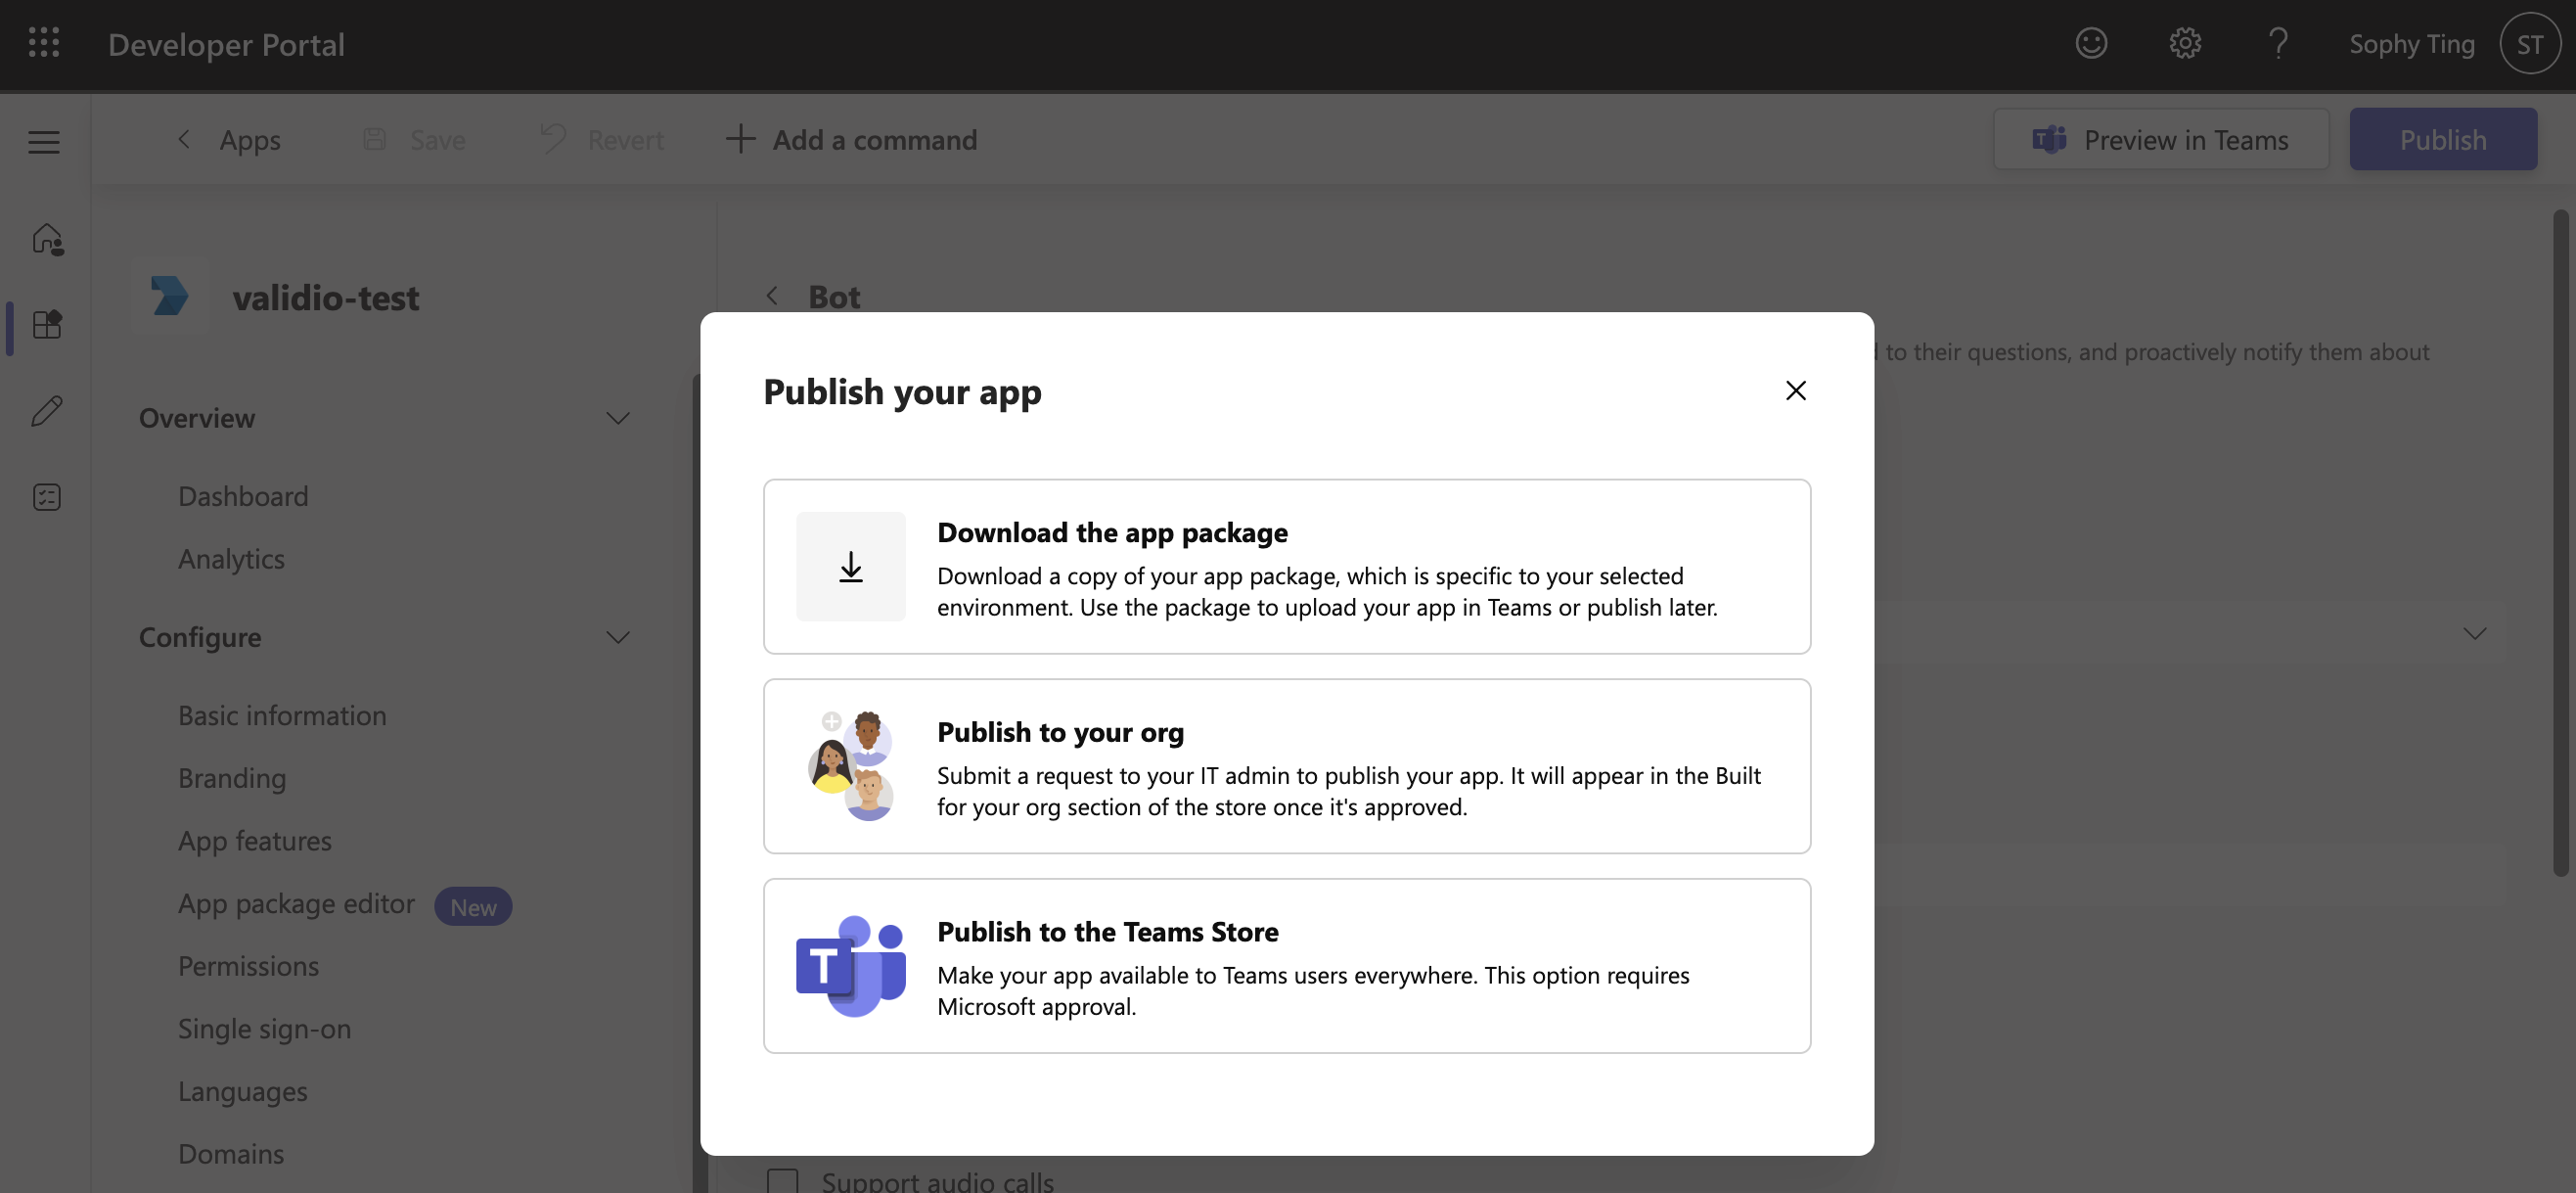
Publishing options for a Microsoft Teams app
- Publish — If you choose this option and Publish to your org, the app is submitted to your Microsoft Teams administrators for approval. After an administrator approves it, the app appears under Built for your org in the Microsoft Teams app store, and anyone permitted to manage apps can add it to a channel.
- Preview in Teams — Redirects you to Microsoft Teams and provides a dialog where you can select the team and channel to add the bot. Not all users will see this option.
Add the Validio App to a Microsoft Teams Channel
Publishing the app makes it available to your organization, but it does not add it to any channel. Validio can only post to channels that the Validio app has been added to, so you must add the app to every channel you want to receive notifications in.
You do not need access to the Microsoft Teams Developer Portal for this step. If a Microsoft Teams administrator has already created and published the Validio app, you only need permission to manage apps in the team you want to notify.
Add the App from a Channel
-
In Microsoft Teams, open the team and the channel you want Validio to post to.
-
At the top of the channel, click + (Add a tab).
-
Select Apps, then search for the Validio app by the name your administrator gave it.
Apps that your administrators have created and approved are listed under Built for your org.
-
Select the Validio app and click Add.
Add the App from the Team
- In Microsoft Teams, find the team in the teams list and click More options (…) > Manage team.
- Open the Apps tab and click Get more apps.
- Under Built for your org, select the Validio app.
- Click Add, then select the team and channel to add the app to.
Microsoft controls the Microsoft Teams interface, so these steps and labels can change. If what you see does not match, see Microsoft's documentation on finding and adding apps in Microsoft Teams.
When the app has been added, Microsoft Teams posts a message in the channel confirming it. If Validio returns the error "The bot is not part of the conversation roster", the app has not been added to that channel. For more information, see Troubleshooting.
Repeat these steps for every channel you want to notify, then copy each channel's Teams channel ID to use when you create the notification channel in Validio. For more information, see Microsoft Teams Channel Configuration Parameters.
Configure a Validio Notification Channel for Microsoft Teams
After you set up your Microsoft Teams app for Validio, create the Microsoft Teams integration in Validio using the bot ID, client secret, and tenant ID you copied, then create one or more notification channels that route alerts to specific Microsoft Teams channels. For more information, see Microsoft Teams integration.
Updated 18 days ago