Teradata
Connect Validio to Teradata for data quality monitoring.
Teradata is an enterprise data warehouse platform designed for large-scale analytics and data management. With Validio, you can monitor and validate your Teradata data to ensure data quality and freshness.
Prerequisites for Integrating with Teradata
In Teradata, create a dedicated read-only service account for Validio and grant it permission to the relevant databases and metadata tables. For more information about access rights, see Teradata documentation.
You can use the following SQL script to set up a Teradata user and grant the necessary permissions for the Source in Validio. Copy the script into a SQL worksheet and follow the steps:
-- Create a user.
CREATE USER validio_user AS
PASSWORD = <password>
PERMANENT = 0 BYTES
SPOOL = 1000000000 BYTES;

-- Grant read access to the following system tables
-- These permissions are required for Validio catalog functionality.
GRANT SELECT ON DBC.DatabasesV TO validio_user;
GRANT SELECT ON DBC.TablesV TO validio_user;
GRANT SELECT ON DBC.ColumnsV TO validio_user;
GRANT SELECT ON DBC.ColumnsQV TO validio_user;
GRANT SELECT ON DBC.QryLogV TO validio_user;
GRANT SELECT ON DBC.QryLogSqlV TO validio_user;

-- For data monitoring and profiling, grant read access to all relevant tables and views.
-- The following grants read access to all existing and future tables and
-- views in a database. Run this command on each database containing relevant tables.
GRANT SELECT ON <DATABASE> TO validio_user;
Resolving Column Data Types for Views
When Validio refreshes catalog assets, it resolves the column data types of every table and view. For views, Teradata can return these types in two ways, depending on whether QVCI is enabled.
If the service account has metadata access but not data access to the underlying tables, catalog asset refresh cannot resolve the view's column types.
To avoid this, choose one of the following:
- Enable QVCI (recommended for restrictive environments). In Teradata, enable QVCI by setting the
DisableQVCIDBS Control flag. Validio can then read view column metadata fromDBC.ColumnsQVwithout access to the underlying tables. Refer to Teradata documentation for the exact procedure. - Grant SELECT on the underlying tables. If QVCI cannot be enabled, grant the Validio user
SELECTon each monitored view and on the tables it reads from, so thatHELP COLUMNcan resolve the column types.
Supported Data Types
Validio supports validation of all standard Teradata data types, including:
- Numeric types (
INTEGER,FLOAT, etc.) - Text types (
VARCHAR,CHAR) - Dates and times (
DATE,TIMESTAMP) - Arrays and complex types (if present)
For semi-structured data types or special fields, see Supported Complex Data Types.
Add a Teradata Credential
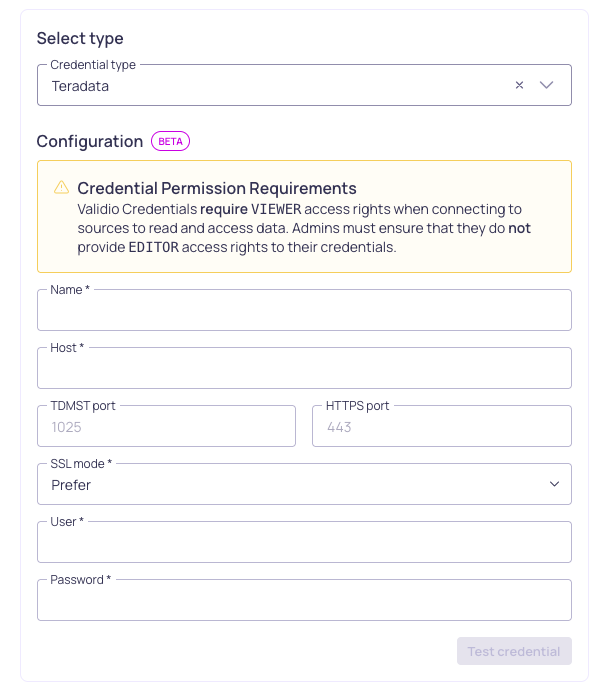
Teradata credential configuration
To add a credential for Teradata,
- Navigate to Credentials and click + New credential.
- Under Namespace, select a namespace where the resources will be created.
- For Credential Type, select Teradata Credential.
- Fill in the Configuration parameter fields. Refer to the Teradata Credential Parameters table.
- (Optional) Click Test credential to validate that Validio can successfully access the Teradata account. If validation fails, check that you provided the correct parameter values.
- (Optional) Check Use for catalog and schema checks to automatically discover assets from this credential and add them to the Catalog page.
- Click Create credential.
Validio will automatically start fetching data and you will be able to view Teradata assets and their relationships in the Catalog (if selected) and Lineage pages.
Once the credential is created, you can add a source to monitor Teradata data.
Teradata Credential Parameters
| Parameter | Description |
|---|---|
| Name | The identifier for the credential, which will be used when adding sources. |
| Host | The Teradata server's hostname or IP address, for example teradata.company.com |
| TDMST port | Port number to use to access the Teradata server via non-SSL connection. Defaults to 1025. |
| HTTPS port | Port number to use to access the Teradata server via SSL connection. Defaults to 443. |
| SSL mode | Specify which SSL encryption mode to use when connecting to Teradata. Options include: Allow (attempt non-SSL, fall back to SSL upon failure), Prefer (attempt SSL, fall back to non-SSL upon failure), Disable (only attempt non-SSL connection), Require (only attempt SSL connection). |
| Username | Username of the Teradata user account with adequate permissions to access the specified database. |
| Password | Password for the Teradata user account. |
Add a Teradata Source
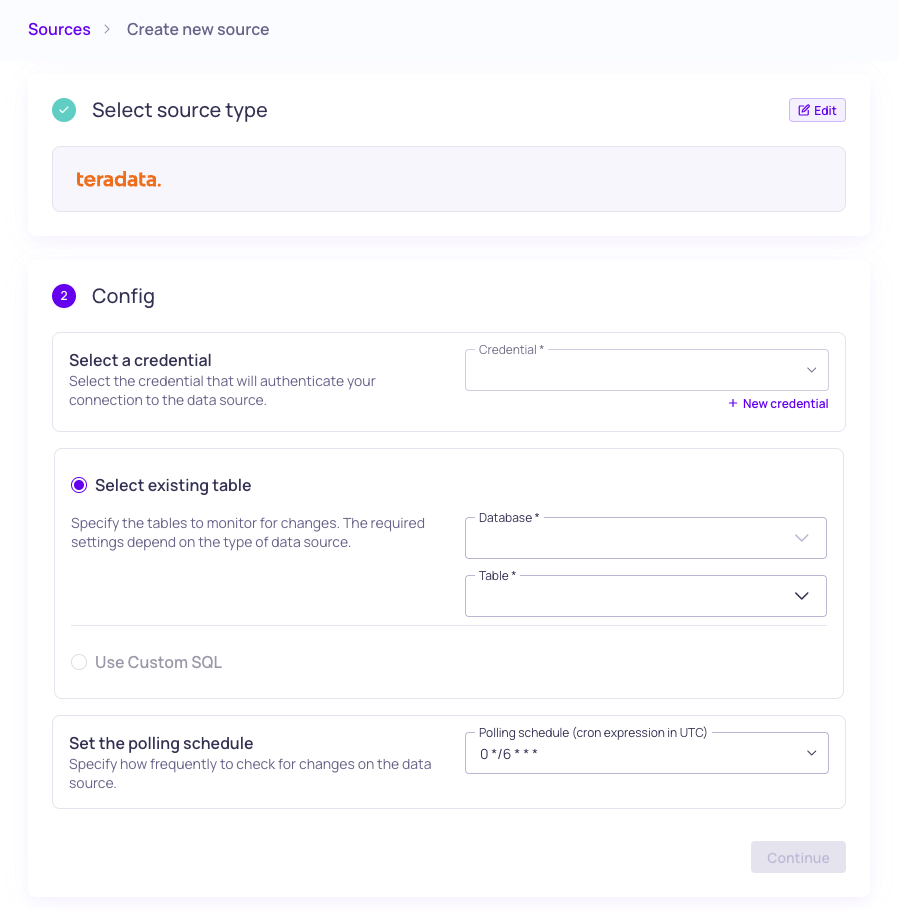
Teradata source configuration
To add a source for Teradata,
- Navigate to Sources and click + New source.
- Under Source type, select Teradata.
- Under Config,
- Select the valid Credential or create a new credential to authenticate your connection to the data warehouse.
- You have two options for specifying the dataset and tables to monitor:
- Select an existing table -- Enter the Database and Table to specify where the data comes from. Selecting more than one table will create a new source for each table. Refer to the Source Configuration Parameters table
- Use Custom SQL -- Write a valid SQL query to specify the tables to monitor. For details, see About Custom SQL Sources.
- Set the Polling schedule, using a cron expression to specify how frequently the validators on the source will check for changes.
- Under Schema, click Continue to automatically infer the schema fields from the tables you selected. If you select many tables, this operation can take a few minutes to complete.
- Under Source details,
- Add Tags to help group related sources or to use for routing notifications.
- Add an Owner who will be the contact for incident notifications.
- Assign a Priority, which indicates the importance of incidents detected on this source.
- Click Continue to create the source.
Source names are generated automatically and will be displayed when the source creation completes. If there are more than 5 sources, you will see the names for the first five and a count of the remaining sources.
Source Configuration Parameters
| Parameter | Description |
|---|---|
| Credential | Teradata credential |
| Database | Name of the Teradata database |
| Table | Name of the table to read data from |
Updated 13 days ago