Configuring a Validator
Use the Validator configuration wizard to set up monitoring on your source.
This guide covers how to configure validators on your sources using the step-by-step configuration wizard in Validio.
Set up monitoring on your sources by configuring validators to track calculated metrics and statistics for different use cases. This page provides steps for manually configuring a validator. If you're not sure where to start, Validio can automatically suggest pre-configured validators for you. For more information, see Generating Validator Recommendations. For information about updating, muting, duplicating, or deleting existing validators, see Managing Validators.
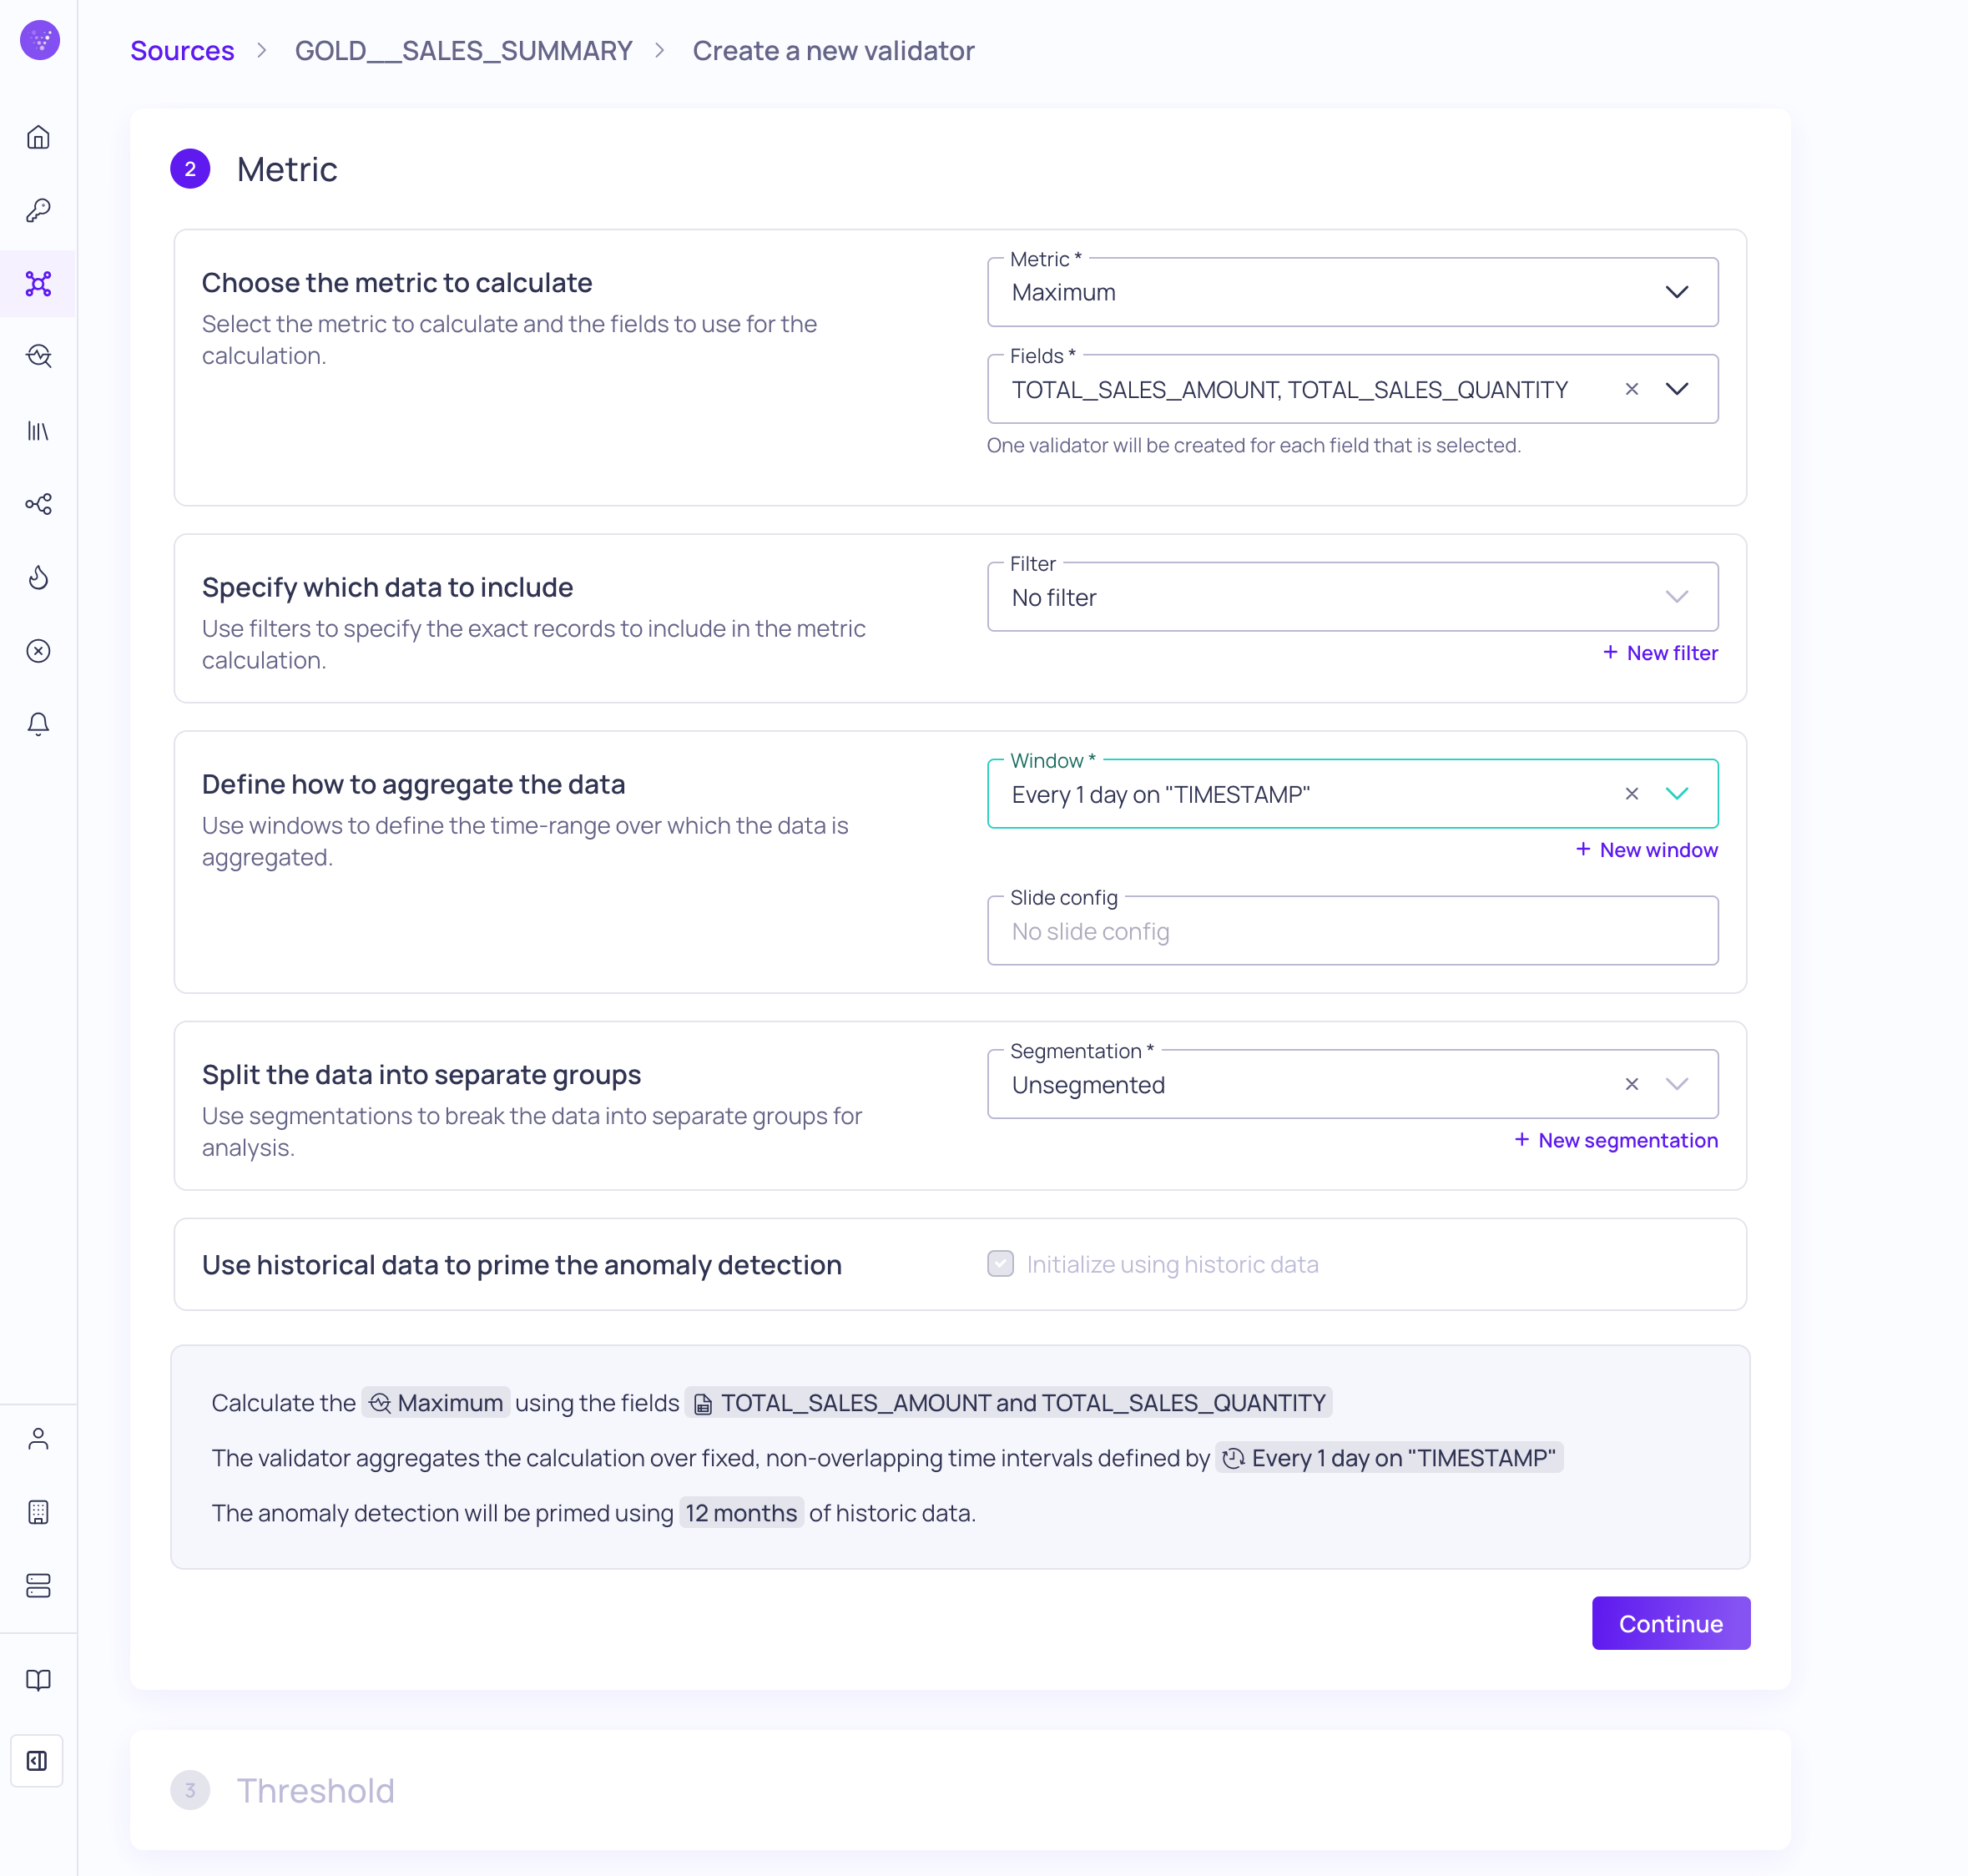
Metric configuration step for a Numeric statistic validator
Configuration Steps
To configure a new validator,
-
Navigate to the source where you want to add the new validator.
-
Click + New validator to start the configuration wizard.
-
Choose the Validator Type you want to configure on this source. For more information, see Validator Types.
-
The Metric steps in the configuration depend on the selected validator type, and can include the following steps:
-
Choose the metric to calculate Select a metric to calculate and the fields to use in the calculation.
For Numeric Statistic and Null Values validators, you can select multiple fields to batch create individual validators for each field.
-
Specify which data to include Use filters to specify the exact records to include in the calculation.
-
Define how to aggregrate the data Use windows to define the time-range over which the data is aggregated.
For Numeric Statistic and Volume validators that use a tumbling window, you can also configure a sliding window aggregation. See Validations with a Sliding Window.
-
Split the data into separate groups Use segmentations to break the data into separate groups for analysis.
-
(Optional) Use historical data to prime the anomaly detection Check Initialize using historical data to prime the anomaly detection algorithms. The amount of historical data is configured with the window.
-
-
Define the Threshold to use for detecting anomalies and triggering incident notifications. For more information, see About Thresholds.
-
Complete the Validator Details,
- Enter a Name and (optional) Description to help explain what the validator is used for.
- (Optional) Add Tags, which you can use to categorize the validator.
- Assign an Owner, who can be responsible for handling incident notifications from this validator.
- Assign a Priority, which indicates the importance of incidents detected on this validator.
- (Optional) Set the Data quality dimension that describes what kind of quality problem the validator looks for, and the Critical fields, which are the data quality fields the validator is intended to govern. Both are pre-filled from the validator type and metric configuration. For more information, see Data Quality Dimensions.
For batch use cases, validator names are automatically generated, and tags, owners, and the data quality dimension are assigned to all validators in the batch. Data quality fields are derived per validator from its own metric configuration.
-
Click Continue to create the validator.
-
After the validator is created, click View validator to open its details page. It will take a few minutes for data to start populating the graph and table on this page--depending on the polling schedule and if you manually backfill the validator.
Validations with a Sliding Window
For Numeric Statistic and Volume validators that use a tumbling window, you have the option to configure a sliding window aggregation. The Slide config allows you to set the number of previous windows to include in each stride (or slide interval).
The sliding window aggregation allows metric calculation over a continuous, moving window of data, while the strides define the amount by which the window advances with each update. Unlike tumbling windows, sliding windows can overlap (if the slide is smaller than the window size), and the aggregate value is updated incrementally as old data points drop out and new ones enter the window, providing a continuous summary of recent data trends.
Initialize using Historical Data
All validator types except for the metadata validators support backfilling, or initializing the validator with historical data. Starting the validator with historical data primes the anomaly detection algorithms, so that you will start to see incidents detected on the past data. As you triage these incidents, you retrain the algorithms for future incident detection.
Backfill occurs when you start the source for the first time, if historical data exists. If you want to load historical data to new validators on a source that is already running, you can select the Initialize using Historical Data option.
The amount of historical data, or lookback period, is defined on the Source-level, but the validator will not use historical data unless the Initialize using Historical Data option is selected. For more information, see Configuring a Source.
Validator Ownership
The owner you assign to the validator will be automatically assigned to incidents detected by that validator and for routing incident notifications. You can update and assign a new owner to the incident group during investigation and triage. For more information, see Managing Incident Groups.
Priority Assignment
The priority setting helps you and other users understand the importance of any issues or incidents that are detected on a source or validator. The priority can be None, Low, Medium, High, or Critical. You can set the priority to a source or validator during configuration. After the resource is configured, you can change its priority at any time from the source details or validators details pages.
Validator priorities will override the source priority. Incidents detected on the source or validator will inherit the priority that is assigned to the validator. If the validator does not have a priority the incident will inherit the source priority. You cannot change the priority on an incident or incident group.
Updated 3 months ago