Saving Searches
Learn how to save Validator and Incident page filters as searches.
Saved Searches are now Saved Views Starting with Validio 7.4, "Saved Searches" have been renamed to Saved Views. We are currently rolling out an updated UI to support this change. You may notice a different interface on the Sources page compared to the Validators and Incidents pages as we finalize the transition across the platform. For more information, see Customizing and Saving Views

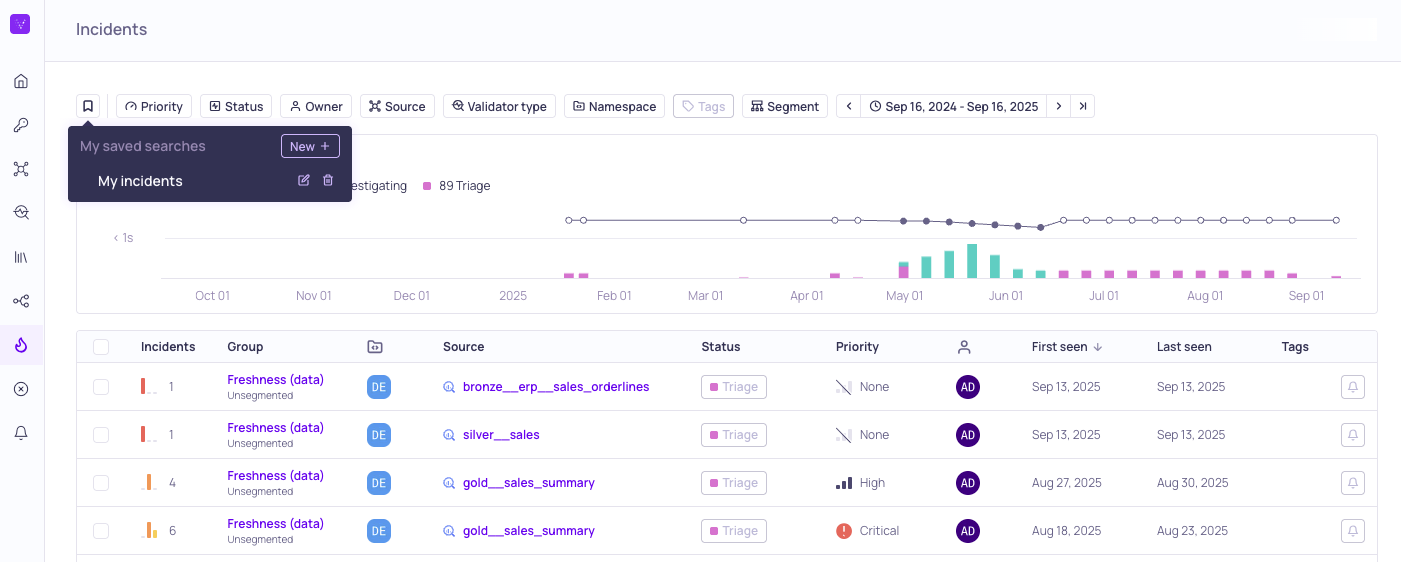
List of saved searches
You can create a Saved Search to preseve specific search queries, sorting preferences, and filter configurations on the Sources, Validators, and Incidents pages. Saved views allow you to return to your preferred setups instantly and share them with teammates across your organization.
For example, you can create a view titled "My incidents" that filters for critical incidents assigned to you within the last 24 hours. Integrating this Saved search into your daily triage workflow ensures you never miss high-priority issues.
The following sections explain how to create, update, and remove saved search on the Validators and Incidents pages.
Create a Saved Search

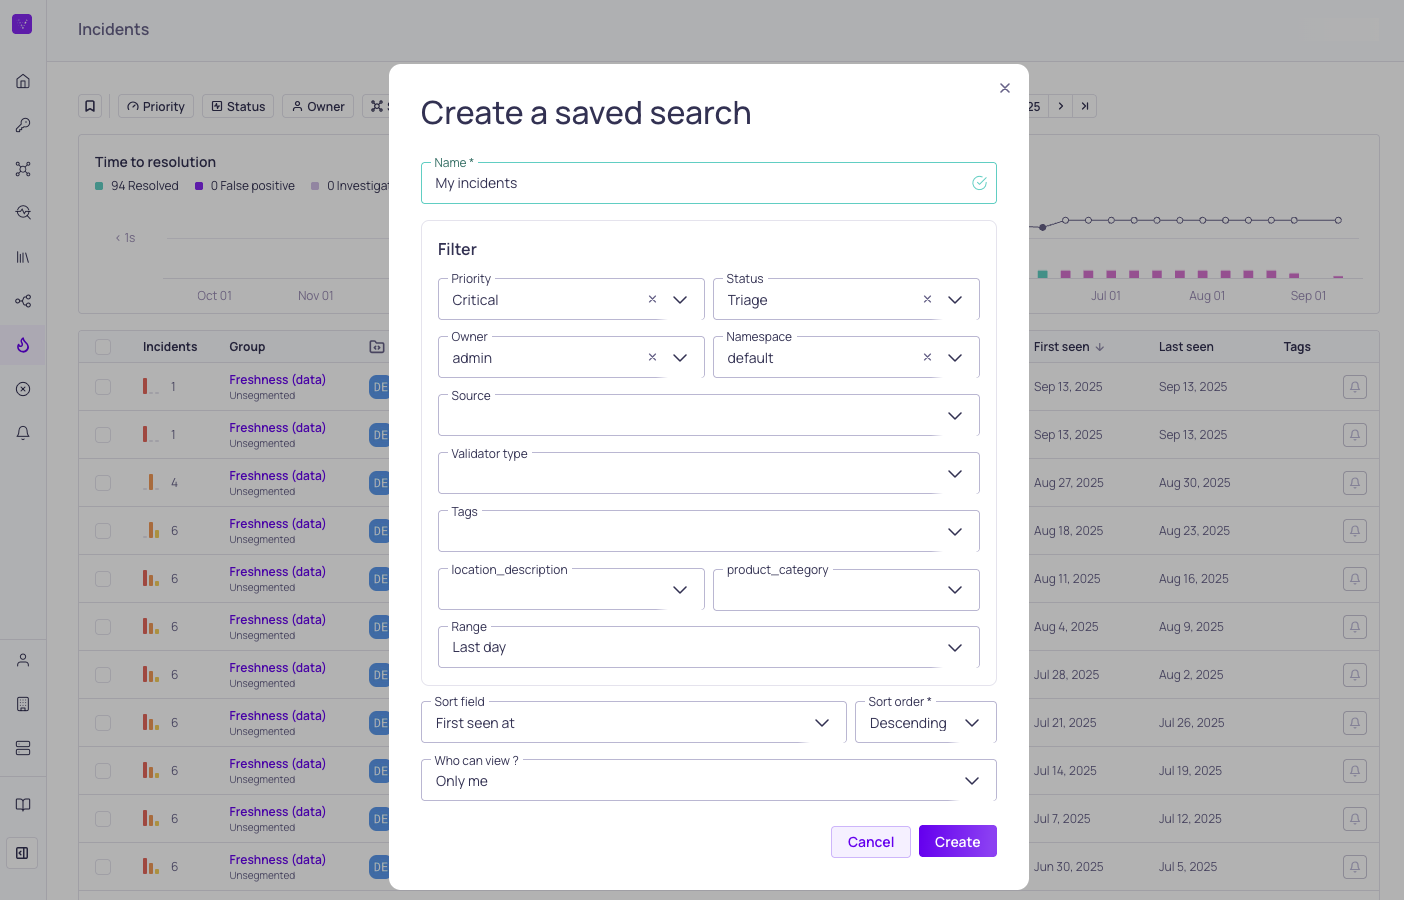
Saved search of incidents group for critical incidents assigned to admin the previous day.
To create a saved search,
- Click the Saved Search (bookmark) icon next to the search bar.
- Click New + to open the Create a saved search dialog.
- Enter a unique Name to identify you will use to access your search or share it with other users.
- (Optional) Select Filters to refine your results. The filtering options (such as Tags, Owner, Source, and more) vary depending on the page you are searching.
- (Optional) Select a Sort field and Sort order.
- (Optional) Select Who can view? your saved search.
- Choose Only me to keep the saved search private.
- Choose Global to make it visible to everyone.
- Click Create to save the search.
Update a Saved Search
To update an existing saved search,
- Open the saved search menu (bookmark icon).
- Next to the saved search you want to update, click the update icon.
- Edit the fields and options you want to update.
- Click Update to save your changes.
View Access for Saved Searches: You cannot update the “Who can view” setting after you set it for the saved search. To make a private saved search global, you will need to save a new search with the change.
Delete a Saved Search
To remove outdated or unused searches,
- Open the saved search menu (bookmark icon).
- Next to the saved search, click the trash icon.
- When prompted, click Remove to delete the saved search.
Updated about 1 month ago