Using the Incidents Page
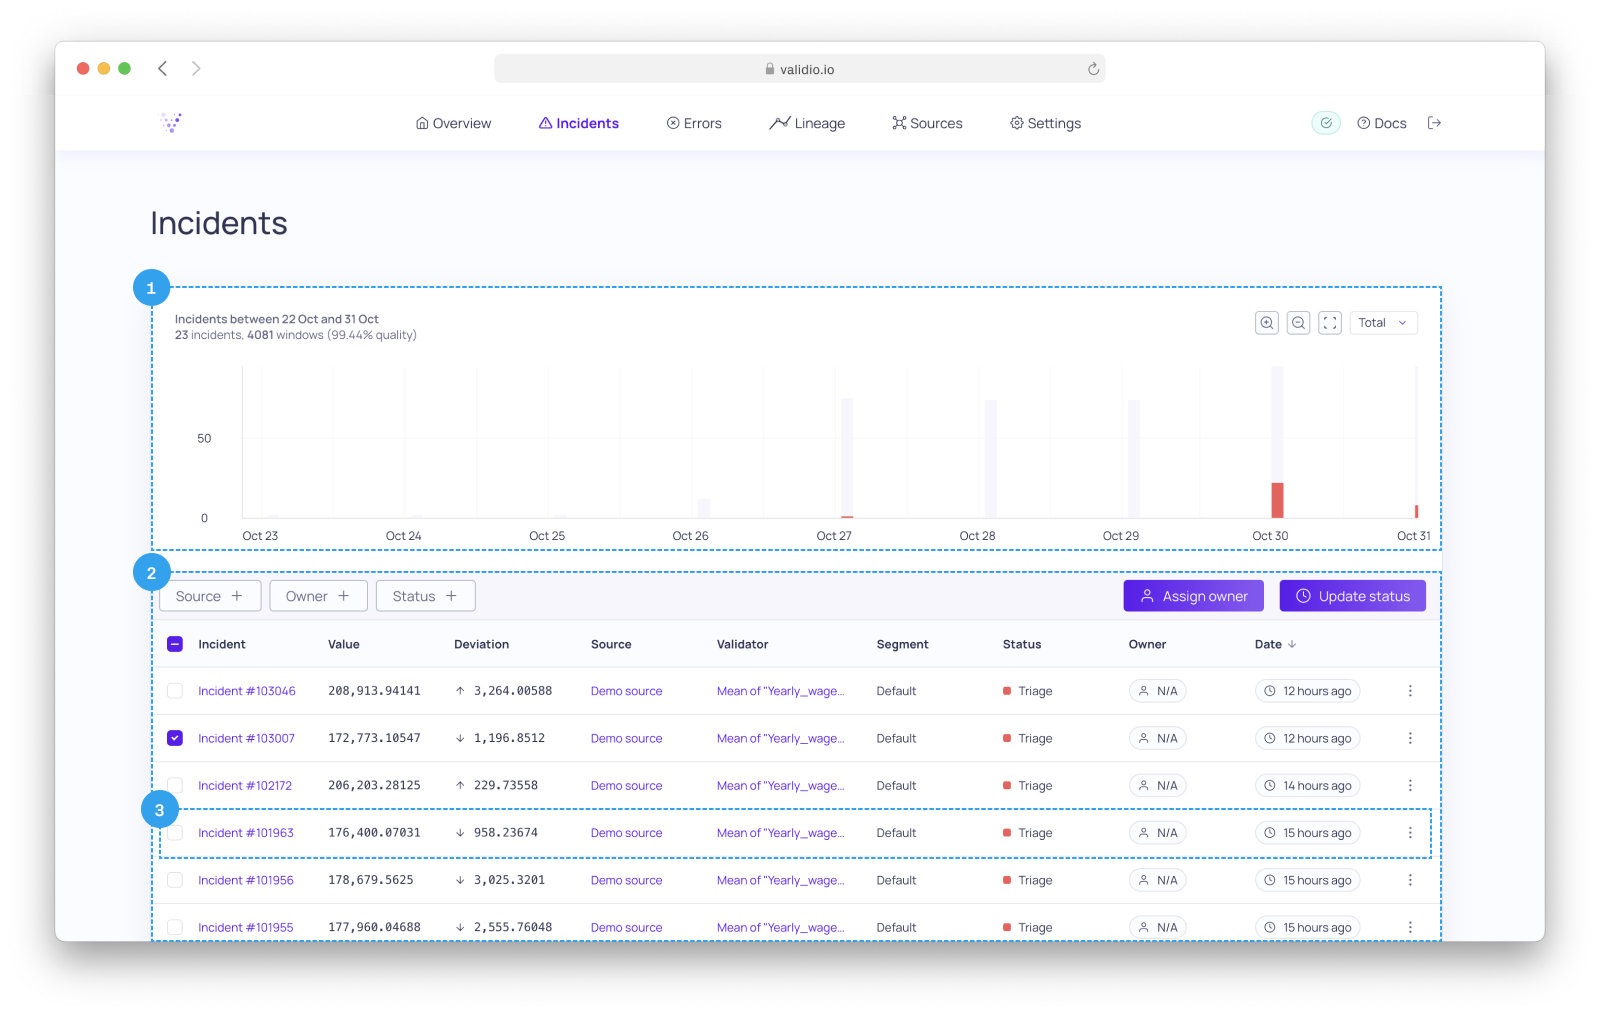
The incidents page gives an overview of incidents, for all your Sources. On the incidents page, you can also assign ownership and status to triage incidents. Additionally, you can delve into detailed views of individual incidents.
For more information, refer to Incidents.

Incidents page
1. Incident graph
The Incidents graph summarizes data quality, for all Sources, over time. You can zoom into the graph using the zoom buttons, or drag within the graph. To pan, hold Shift and drag within the graph.
2. Incident list
A list of all incidents visible in the Incident graph.
Filter and sort the incidents list
- Click on Source +, Owner + or Status + to filter incidents.
You can also filter incidents by zooming into a specific time range in the incidents graph. - Click on Date to sort incidents on data-time, ascending or descending.
Batch operations
You can assign an owner to, or update the status of, multiple incidents at once:
- Click on the checkboxes for one, or many, incidents.
- Click the button Assign owner, or the button Update status, depending on what action you want to perform.
3. Incident summary
Each incident in the list has the following details:
- Incident - A text describing the incident.
- Value - The value of the validator metric.
- Deviation - How prominent was the incident, defined as the delta between Value and the breached boundary.
- Source - Where the incident occurred, for example, the name of the
SourceandValidator. - Validator - The validator capturing the incident.
- Segment - The segment, if any, where the incident was captured.
- Status - For example
Investigating. - Owner - Username of any owner assigned to the incident.
- Date - How long ago the incident occurred.
Incident details page
If you click on an incidents, you will navigate to the Incident details page.
⋮ Menu options
⋮ Menu optionsEach incident in the list has a ⋮ menu with the following options:
- Assign owner
- Remove owner
- Update status
Updated 10 months ago
